
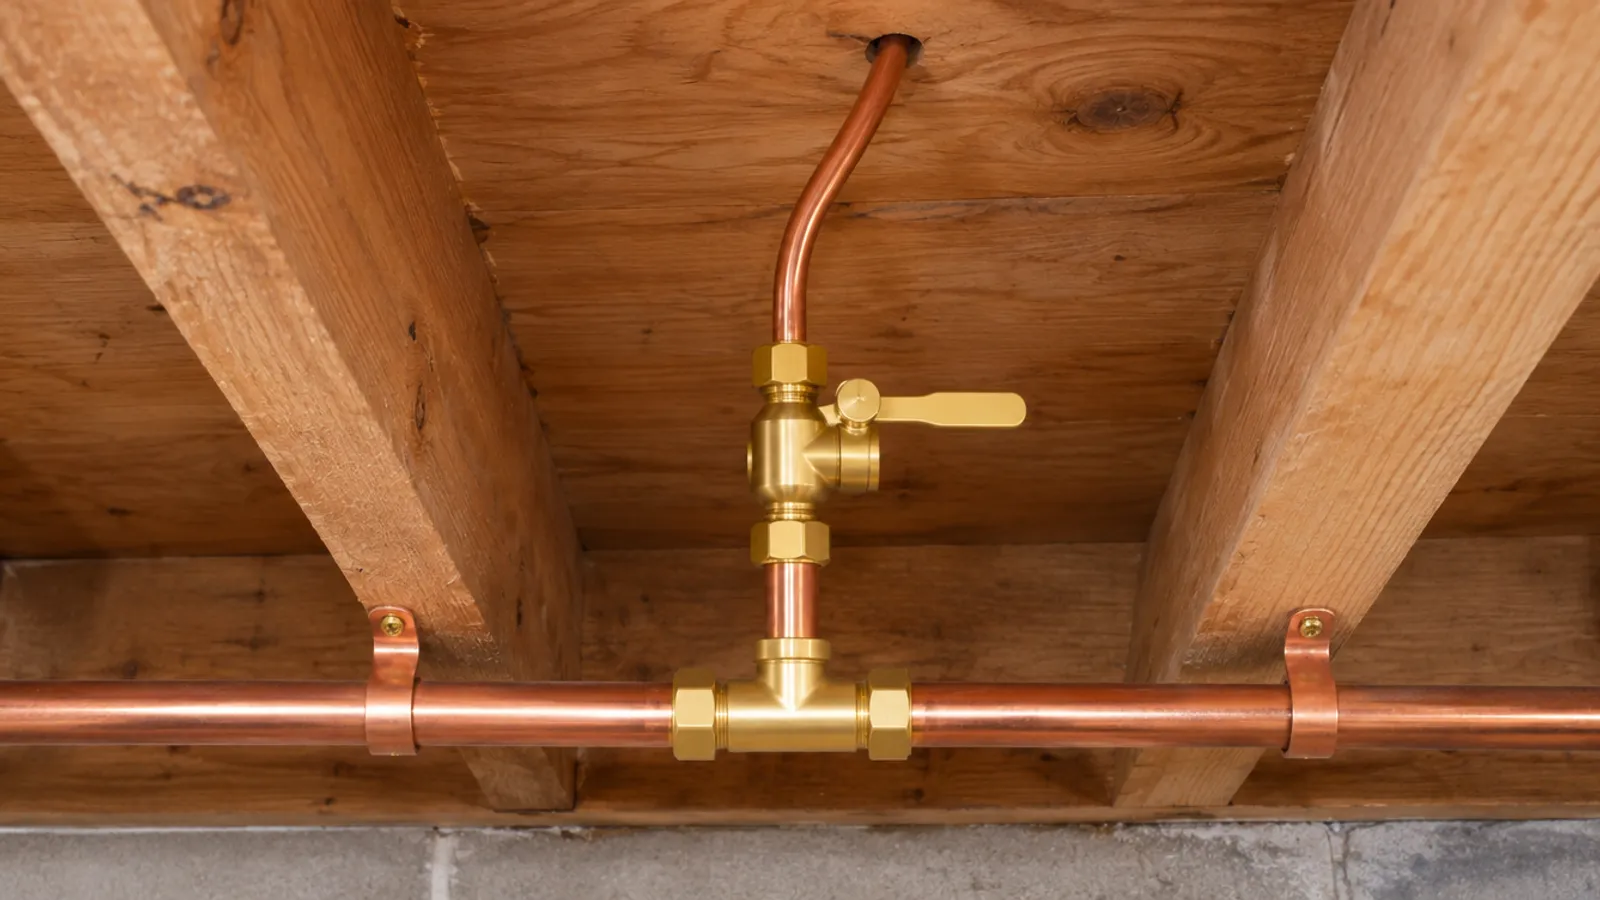
To install an ice maker water line, shut off the water, cut a tee into a cold drinking-water pipe, add a quarter-turn stop valve, and run 1/4 in OD tubing to the refrigerator's water inlet. Flush the tubing into a bucket, connect it with a compression nut and ferrule, then check every joint for leaks.
Below: how to install ice maker water line kits with a tee and a stop, and where that stop should go. Whether you run a water line to a refrigerator from the sink cabinet or the basement, two of the three refrigerator installation guides we read ask for the shut-off valve in an easily accessible place, and the built-in model's guide calls it required.
What do you need to install a water line for your refrigerator?
Start with your refrigerator's installation guide: it names the water line, fittings and water pressure your model needs to feed the ice maker or water dispenser. The three we read all ask for 1/4 in OD tubing on a cold supply, and differ on the rest:
| Installation sheet | Water pressure | Tubing | How much tubing |
|---|---|---|---|
| One maker's built-in refrigerator guide | 40 to 120 psi | 1/4 in OD copper, or the maker's own plastic tubing kit | Long enough to reach the front of the refrigerator |
| A freestanding refrigerator guide | 40 to 120 psi in its warning; 20 to 120 psi in its parts list | 1/4 in OD copper, or the maker's own plastic tubing kit | The run to the pipe, plus enough to move the fridge out from the wall |
| A top-mount refrigerator's sheet | 30 to 100 psi | 1/4 in (6.4 mm) OD copper | The run to the pipe, plus 7 ft (2.1 m) |
Use copper, or only the plastic tubing your refrigerator's maker approves; the freestanding guide warns that other plastic water lines can crack or rupture with age. Add a tee for your cold water line (soldered for copper pipe, crimp or expansion for PEX, or compression), a quarter-turn stop whose compression outlet fits the water line, a nut and ferrule per end, a tube cutter, two wrenches, a bucket, and a drill that is double insulated, grounded or battery powered, as that guide asks. If the water comes from an RO system and the refrigerator has its own water filter, the freestanding and built-in guides both say to fit the refrigerator's filter bypass plug.
Should a saddle valve or a tee feed your fridge's ice maker?
Many refrigerator water line kits still include one: a clamp-on valve that taps the side of the pipe. The top-mount sheet says not to use a self-piercing shut-off valve, and the built-in guide says to check that a saddle-type valve complies with your local plumbing codes before you buy one.
A tee cut into the pipe, with a quarter-turn stop on its branch, avoids the question. One stop maker's instructions say its stops must be fully open or fully closed, so never use the stop to throttle the flow. Replacing an old tap? Disconnect the old line and, with the clamp removed, cut out the pierced section of pipe and fit the tee there.
Where should the ice maker shut-off valve go?
On the cold drinking-water line nearest the refrigerator, where you can reach it without tools. The freestanding guide says to put the shutoff valve "on the nearest frequently used drinking water line" and to "choose a location for the valve that is easily accessible". The built-in guide says to "install a shut-off valve between the icemaker water valve and cold water pipe in a basement or cabinet", and that it "should be located where it will be easily accessible". The stop maker's sheet limits its stops to accessible locations and says to inspect them once a year.
On the pipe, the freestanding guide prefers the side of a vertical pipe. On a horizontal pipe, connect at the top or side, not the bottom, so the valve doesn't draw off sediment.
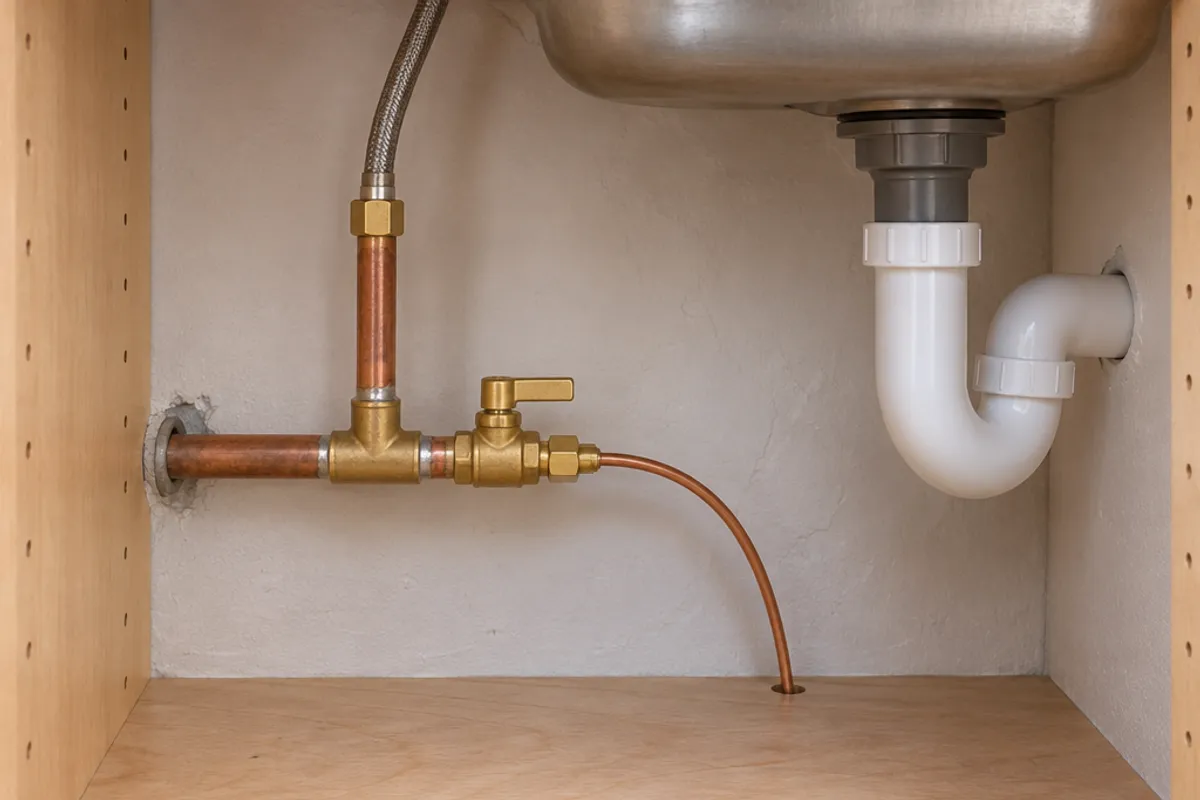
Where the shut-off valve ends up decides what it needs in front of it:
| Where the stop is | Can you reach it? | What it needs |
|---|---|---|
| Kitchen sink cabinet | Yes | Nothing |
| Unfinished basement ceiling under the kitchen | Yes | A simple tag on the valve |
| Crawl space under the kitchen | Only by crawling in | Keep the line out of it if it can freeze; the built-in guide names a basement or cabinet |
| Recessed ice maker box behind the refrigerator | Yes, once it rolls out | Nothing; the box face is the access |
| Exposed on the wall behind the refrigerator | Only after you pull it out | Tubing slack, or a stop in the sink cabinet or basement instead |
| Finished basement ceiling | No, drywall covers it | An access door under the valve |
| Inside the wall behind the fridge, with no box | No | An outlet box, or an access panel in front of the valve |
How do you install a refrigerator water line, step by step?
This step-by-step guide combines the refrigerator water line sheets above with the stop maker's instructions. Read the sheet for your new refrigerator first.
Unplug the refrigerator before you start: the top-mount sheet says to ensure it isn't plugged in while you connect the water. Soldering a tee into copper means a torch near wood framing. Use a licensed plumber for work on your home's water supply where your area requires one.
- Shut off the whole house supply at the main, then open the nearest faucet to drain the line.
- Pick the spot on the cold pipe. Never the hot one: the freestanding guide warns of burns and damage to the refrigerator. If pipes bang when a valve shuts, the same guide says to have a plumber fix it first; see how to fix water hammer.
- Cut the pipe and fit the tee. Solder any copper joints before the stop goes on: the stop maker says not to sweat within 12 in of its quarter-turn stop.
- Fit the shut-off valve on the tee's branch and close it.
- Drill a hole for the water line through the floor or the wall behind the fridge, or through the next base cabinet, as close to the wall as you can.
- Run the water line to your fridge without kinks, away from any space that freezes (the freestanding guide warns against it). Cut copper square.
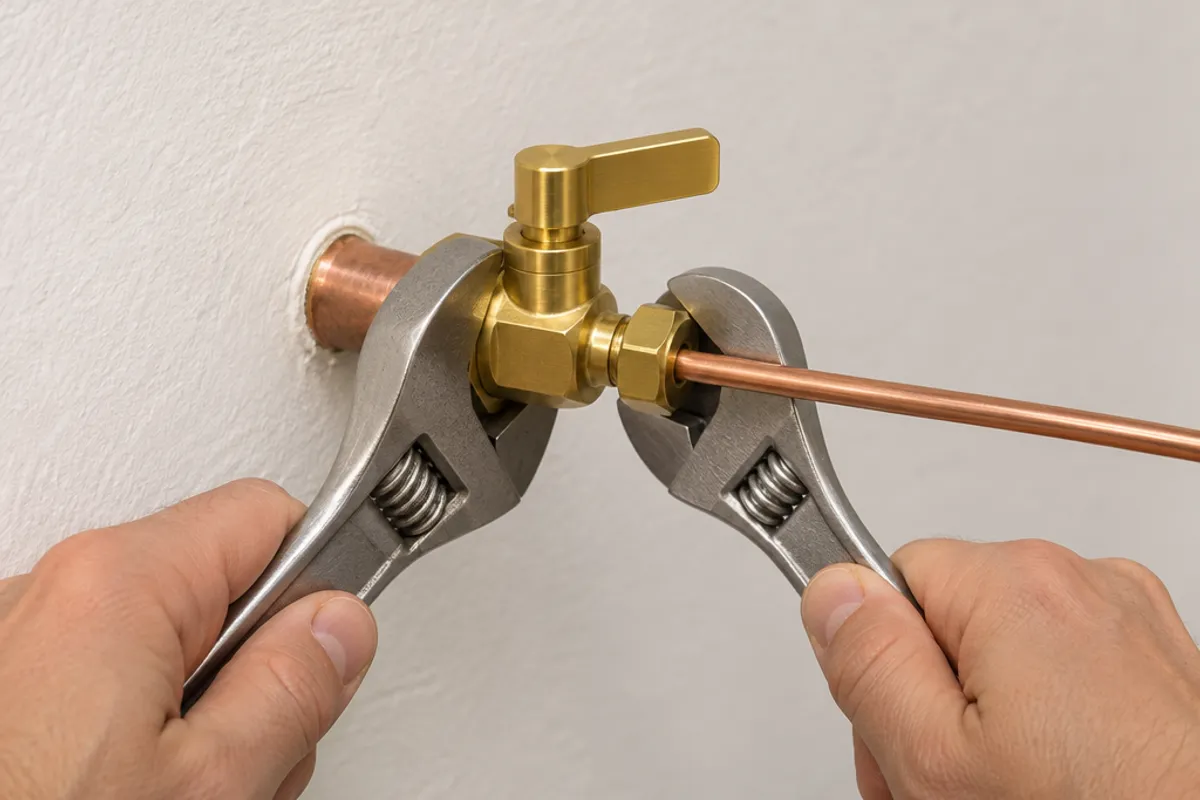
- Connect the water line to the stop with a compression nut and ferrule, as in what a compression fitting is.
- Flush the water line: hold one end in a bucket, open the stop, and run about a quart of water (the freestanding guide says about 1 liter, or 2 minutes) until it is clear. Close the stop.
- Connect the water line to the refrigerator's inlet: nut, ferrule, tube pushed fully in, finger-tight, then the extra the sheet gives (another half turn on copper, says the top-mount sheet). Don't over-tighten.
- Coil the water line's slack behind the fridge so the appliance can roll out for cleaning, clear of anything it could rub against.
- Open the stop and check each connection on the water line; tighten any that leak. The top-mount sheet says to check again after 24 hours.
How do you install an ice maker box?
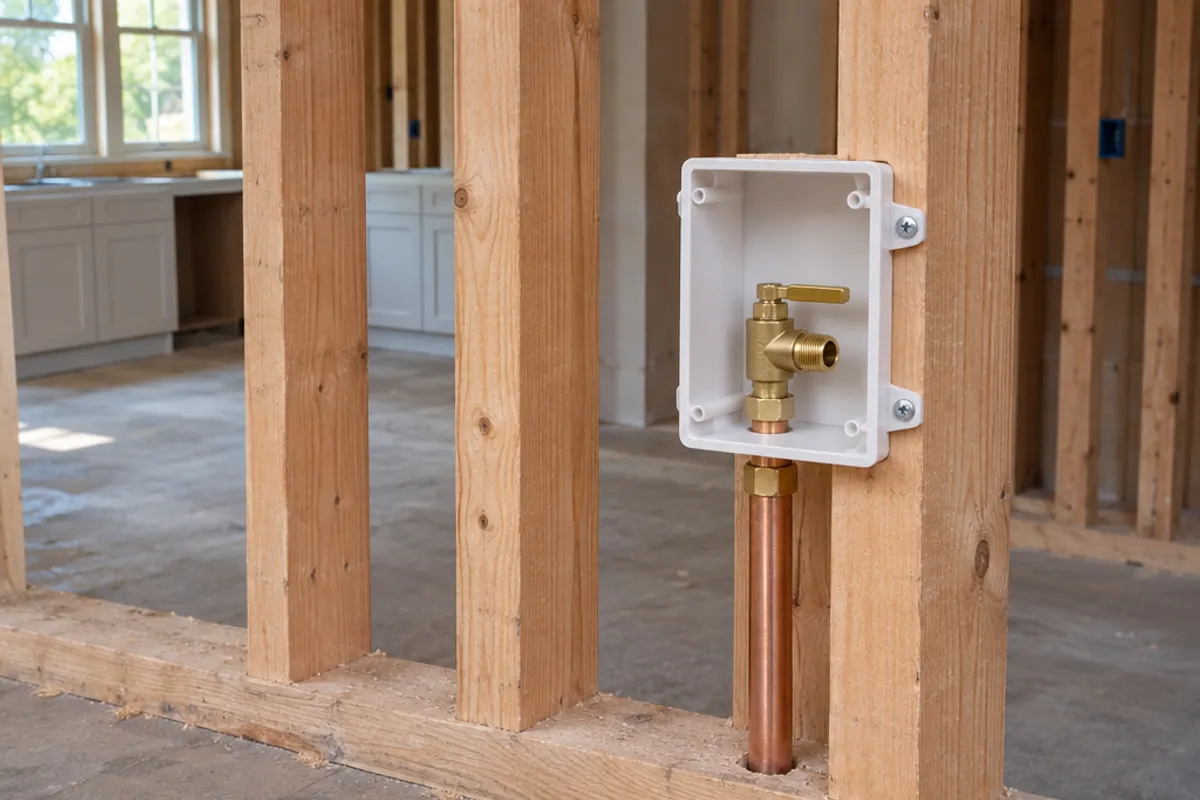
An ice maker outlet box puts the valve in a plastic box set into the wall behind the fridge, so the stop sits recessed in the wall. If the wall is open, learn how to install one: the box face is the access to the stop. Ice maker box installation, per one box maker's instructions:
- Set the box for water from above or below, and fasten it to a stud, or between two studs on a bracket.
- With the valve closed, connect the supply; get the system pressure tested and checked for leaks before drywall.
- Cover the box with its debris sticker; the sheet lists a minimum cut-out 5.75 in high and 4 in wide.
- After the wall is finished, seal between box and drywall, fit the face plate, turn the water on and check the valve for leaks.
Place the box where the refrigerator's inlet and water line can reach it. If your refrigerator's guide has a rough-in drawing, follow it; the built-in guide shows the water line entering through the floor or the back wall.
What access panel fits over an ice maker shut-off valve?
Only the cases in the table where drywall covers the stop: a finished basement ceiling under the kitchen, or a stop left inside the wall behind the fridge with no outlet box. Center the opening on the valve, with room for your hand to turn the handle through its quarter turn.
- Overhead, in a finished basement ceiling: PAD0808 hinged door: maximum service opening 6.35 × 6.35 in, overall 8 × 8 in
- In the wall behind the fridge: SAP0808 spring-loaded panel: fits 6 × 6 to 8 × 8 in openings, overall 10 × 10 in
Our plastic access panels and doors are not fire-rated, and we publish no water-resistance rating for them, so don't fit one in a fire separation, such as the wall between a house and an attached garage.
More choices are on the plumbing access panel page. To find the main before you start, see where the water shut-off valve is.
Measure before you order: our guide on how to measure for an access panel shows how, and the access panel size chart compares every opening and cover. How to install an access panel in a ceiling covers fitting it.