
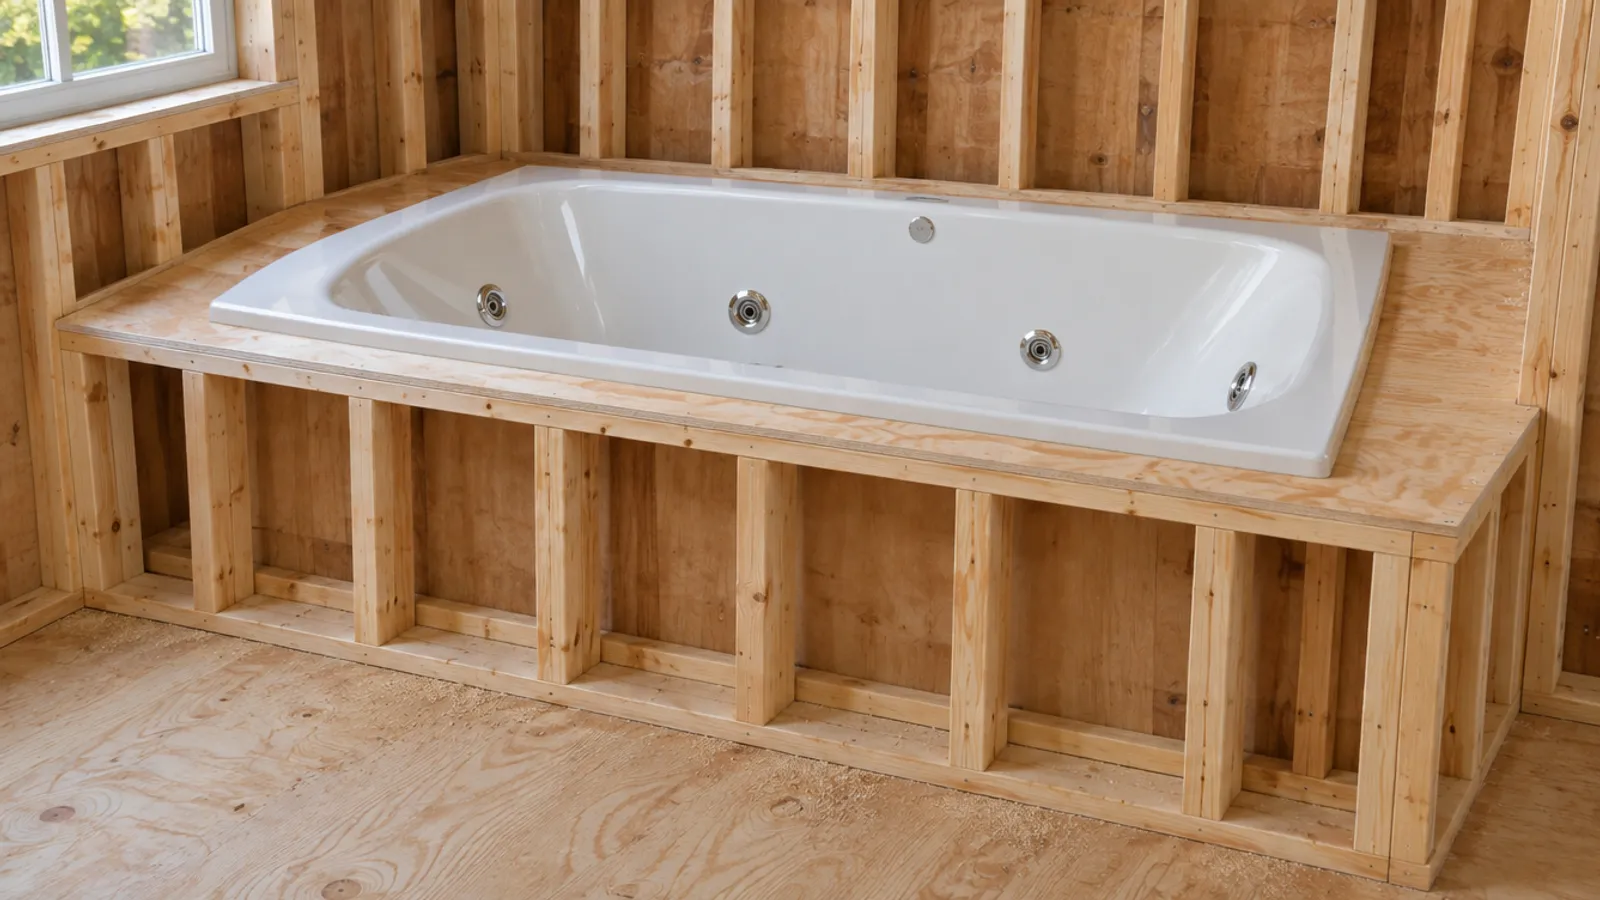
To install a whirlpool tub, build the frame to the maker's roughing-in guide, run the drain and supply lines, set the tub on a solid, level subfloor, have a licensed electrician wire its GFCI-protected dedicated circuit, then test-run the jets for leaks before you close the deck, leaving an access panel at the pump.
A whirlpool is a bathroom luxury, but it adds a pump, a motor, a circuit and extra plumbing to an ordinary bathtub project, and all of it ends up under the deck. Here is how to install a whirlpool tub in the order one manufacturer's drop-in whirlpool installation guide sets out. Where your own tub's guide differs, follow the manufacturer's instructions for your model.
Is a whirlpool tub the same as a hot tub?
No. A whirlpool tub is a bathtub with jets. You fill it from the faucet for each bath, a pump draws the water in through a suction fitting and pushes it back out through the jets, and you drain it afterwards. A hot tub or spa keeps its water between uses, heated and filtered, and is usually outdoors, with its own electrical requirements. Many people call a whirlpool bathtub a jacuzzi tub, and "jetted tub" covers both whirlpools and air tubs, which blow air through small holes with a blower instead.
Whirlpool tubs come in acrylic, fiberglass and cast iron, as drop-in, alcove and other installation types. Some units include an in-line heater that keeps the bath water warm, and the jets turn on from an air switch button on the deck. If you are upgrading from a plain bathtub, plan for the new circuit and the pump access that the old tub never needed.
How do you install a whirlpool tub, step by step?
These steps follow a drop-in tub set into a framed deck; alcove units with a removable apron follow the same order.
- Read the guides. The first step is the installation guide and the roughing-in guide packed with the tub. They give the framing dimensions, the drain position, the pump location and the floor loading the subfloor must carry. Plan the pump access and the outlet now.
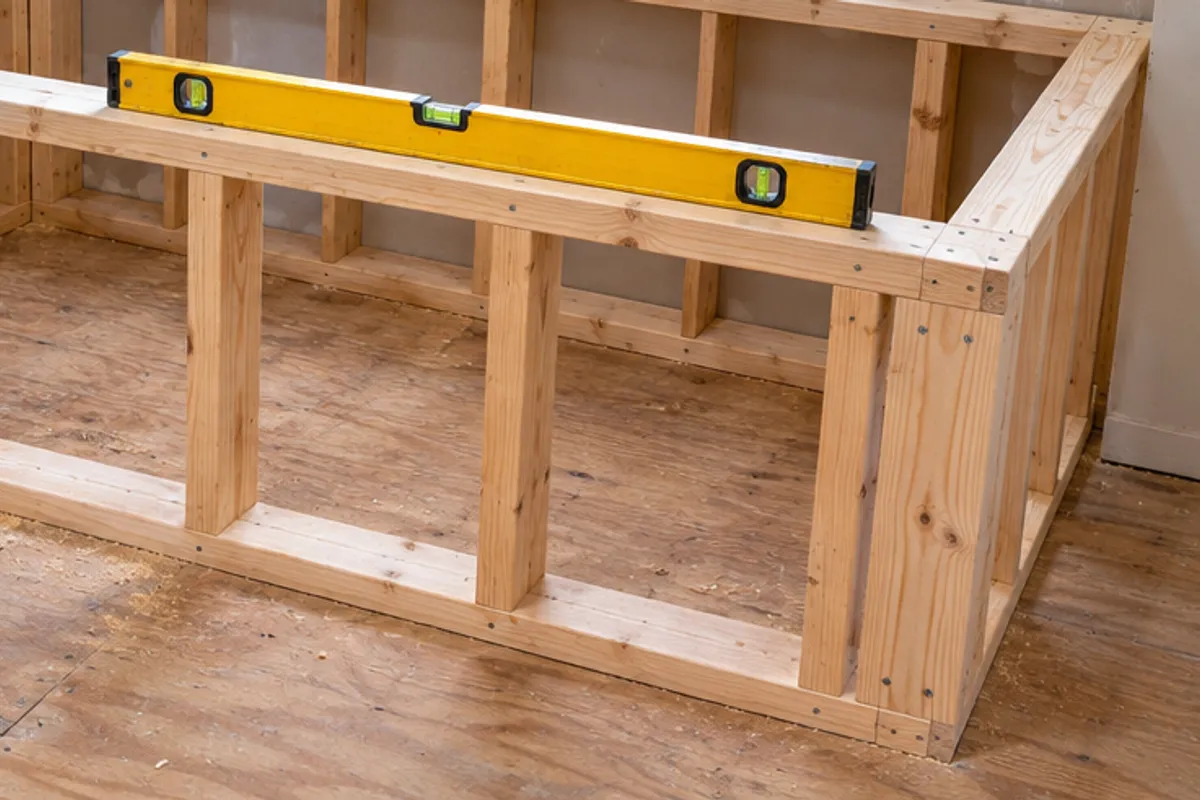
- Check the floor. Pay careful attention to the subfloor: it must be flat, level and strong enough for the filled tub. One manufacturer's alcove whirlpool guide says never to install the tub directly on open floor joists.
- Frame the deck. Build the stud framing to the roughing-in dimensions, allowing for the thickness of the deck material and tile. Frame the access opening at the pump end while it's easy.
- Rough in the plumbing. Extend the hot and cold supply lines, copper or PEX, to the faucet position, and run the drain line and trap. Cap the supplies and check for leaks.
- Rough in the electrical. An electrician runs the dedicated circuit and installs the outlet for the pump, plus a second one for a heater (next section).
- Prepare the tub. Fit the drain and overflow following the drain manufacturer's instructions, but don't connect the trap yet.
- Set the tub. Lift it by its sides, never by the pump or the piping. It rests on its feet or base, not on its rim. Shim under the supports with metal, hardwood or other durable material if the floor is out of level. The drop-in guide also offers an optional 2 in bed of cement or mortar, kept clear of the pump bracket and support blocks, and rules out gypsum cement and drywall compound.
- Free the pump. Cut any shipping straps and secure the pump bracket as the guide shows. Don't relocate the pump: the guides warn that moving it can affect safe operation.
- Connect and test. Connect the drain to the trap and the supplies to the faucet valve, plug in the pump, and test-run the tub with the deck still open.
- Finish the deck. Fit the deck surface and tile, seal the edges as the guide says, and install the access panel.
What are the electrical requirements for a whirlpool tub?
The electrical requirements come from the tub's installation guide, the rating label near the pump, and your electrical code. Water and electricity meet at the pump, so safety comes first. Here is what the drop-in guide asks for, as an example of the details to look for in yours:
| Item | What the drop-in guide calls for |
|---|---|
| Circuit | A dedicated 120 V, 15 A, 60 Hz service with no other load on it |
| Protection | A Class A ground-fault circuit interrupter (GFCI) |
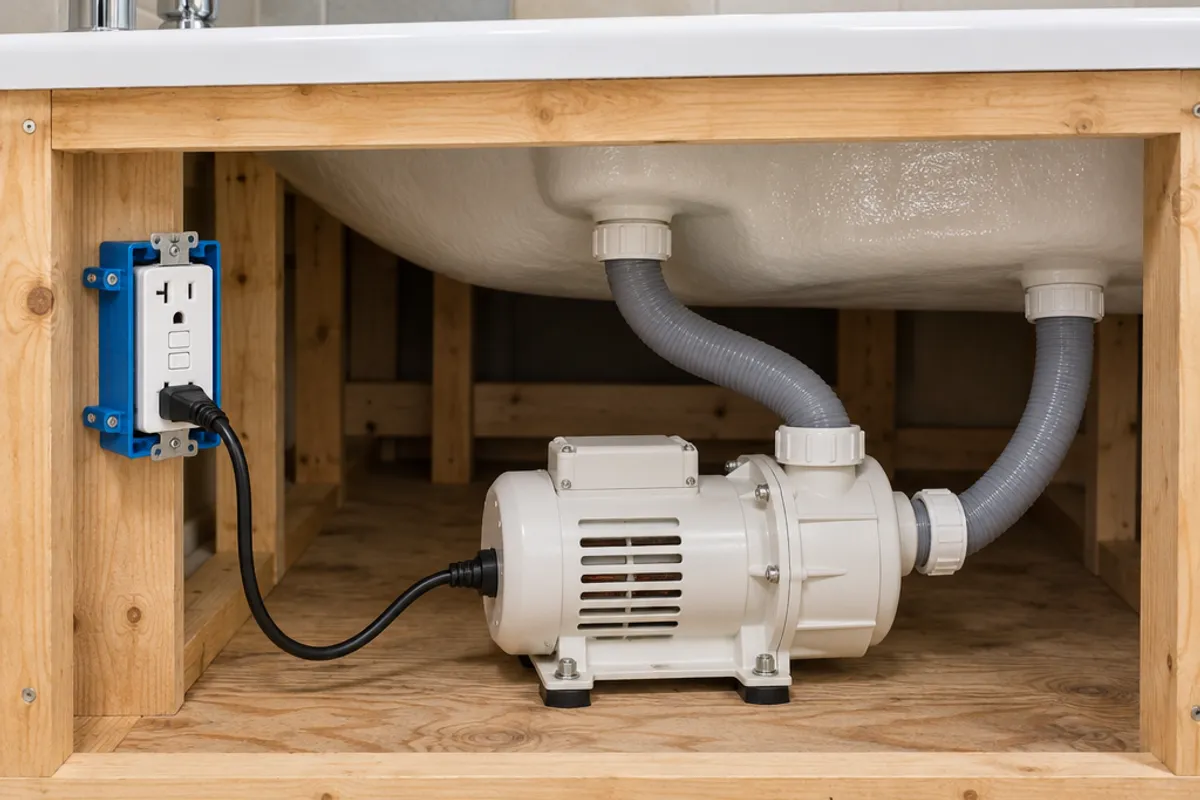
| Outlet | A grounded, GFCI-protected outlet behind the tub, within 24 in of the pump |
| Heater | A second, separate dedicated circuit and outlet on models with a heater |
| Bonding | Bond in accordance with applicable codes |
| Plug | No grounding adapters, and never remove the ground pin |
Your model may differ, so read the label near the pump: it gives the model number and electrical rating, which answers how many amps your tub draws and what size breaker it needs. An electrician then sizes the breaker and the wiring to suit. In an older house, ask them to check the panel has space for new circuits and to look at the existing wiring, copper or aluminum, before adding to it. The alcove guide adds two details: connect the pump only to a properly installed GFCI, and bond it as local codes require.
The outlet ends up under the deck, behind the tub, so place it where the pump access opening reaches it. Ask your local electrical inspector what they expect to see before the deck is closed.
The pump circuit is new electrical work next to water. The drop-in guide says a qualified electrician should make all electrical connections, and your area may require a licensed electrician and a permit. For safety, disconnect the power at the breaker before anyone works on the pump or the outlet. If the copper supply lines are soldered, use a licensed plumber where your area requires one.
Where does the whirlpool tub access panel go?
At the pump end, as close to the pump as you can make it. The drop-in guide calls for unrestricted service access to the pump and controls, located immediately next to the pump, and notes that an access panel will simplify future maintenance. The alcove guide adds access to all plumbing connections, at the back of the plumbing wall whenever possible. Through that opening you reach the motor, the pump unions, the heater, the outlet and any other equipment under the deck, and you can disconnect the pump and pull it out for service without breaking tile. Leave clear space in front of it to kneel.
Size the opening from the roughing-in guide and the pump itself; our jetted tub access panel size guide covers sizing in detail. Then compare the opening with what each product fits:
- The SAP1414 spring-loaded panel fits openings from 10 × 10 in to 14 × 14 in, with a 16 × 16 in cover. It is a removable panel with no hinge.
- The PAD1216 hinged door has a service opening of 10.35 × 14.35 in (estimated). A hinge is a convenience if you'll open it often.
If your guide calls for a larger opening than 14 × 14 in, nothing in our range fits it. More options are on the jetted tub access panels page.
How do you test a whirlpool tub before closing the deck?
Test with the deck open, so you can see every connection. The guides' test run:
- Check that the electrical connections are made, the power is on, the pump unions are hand tight and the pump rests on the subfloor or tub base.
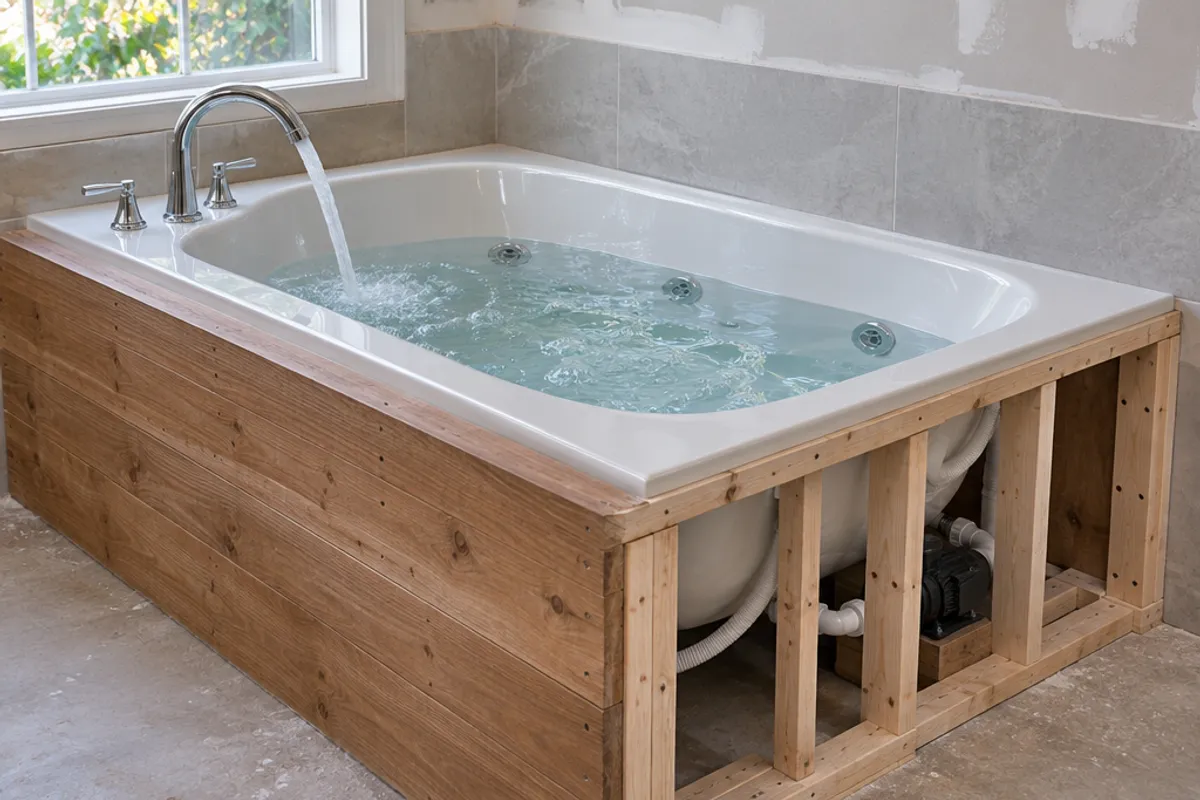
- Fill the tub to at least 2 in above the top of the highest jet.
- Run the jets for 5 minutes and check all the piping connections for leaks.
- Turn the jets off, drain the tub, and watch the drain connections and the trap.
The alcove guide warns against filling above the bottom of the overflow during the test: the piping can leak, and the tub isn't designed to hold water above the overflow. If a leak shows up only when the tub is filled high, see tub overflow gasket leaking.
Then test the GFCI as its own instructions describe, to confirm it cuts power to the pump. A dry deck after the test run is your sign to close it up.
What mistakes lead to water damage later?
- Tiling over the pump end. Without an access opening, the next pump repair means breaking tile and drywall.
- Resting the tub on its rim. The drop-in guide says the feet or base carry the load; the rim needs support but must not carry the tub's weight.
- Sharing the circuit. The drop-in guide allows no other load on the pump circuit, so lights, a fan and other bathroom fixtures belong elsewhere.
- Testing after the tile is on. A leak found then costs the finish. Test with the deck open.
- Skipping the seal. Seal the edges where the guide says, so moisture doesn't soak into the framing.
Do you need a licensed electrician or a permit?
For the electrical work, usually yes. The drop-in guide says a qualified electrician should make all electrical connections, and your area may require a permit and a licensed plumber for a new supply line or drain. Homeowners with carpentry and plumbing experience can often do the framing, setting and plumbing; hire a professional for anything beyond your expertise, or let a contractor coordinate the trades. Ask your local building department what your project needs and how its inspection process works, and book any inspection while the deck is still open.
Next, size the opening with our jetted tub access panel size guide, see how to install an access panel in drywall, and compare every opening in the access panel size chart.