
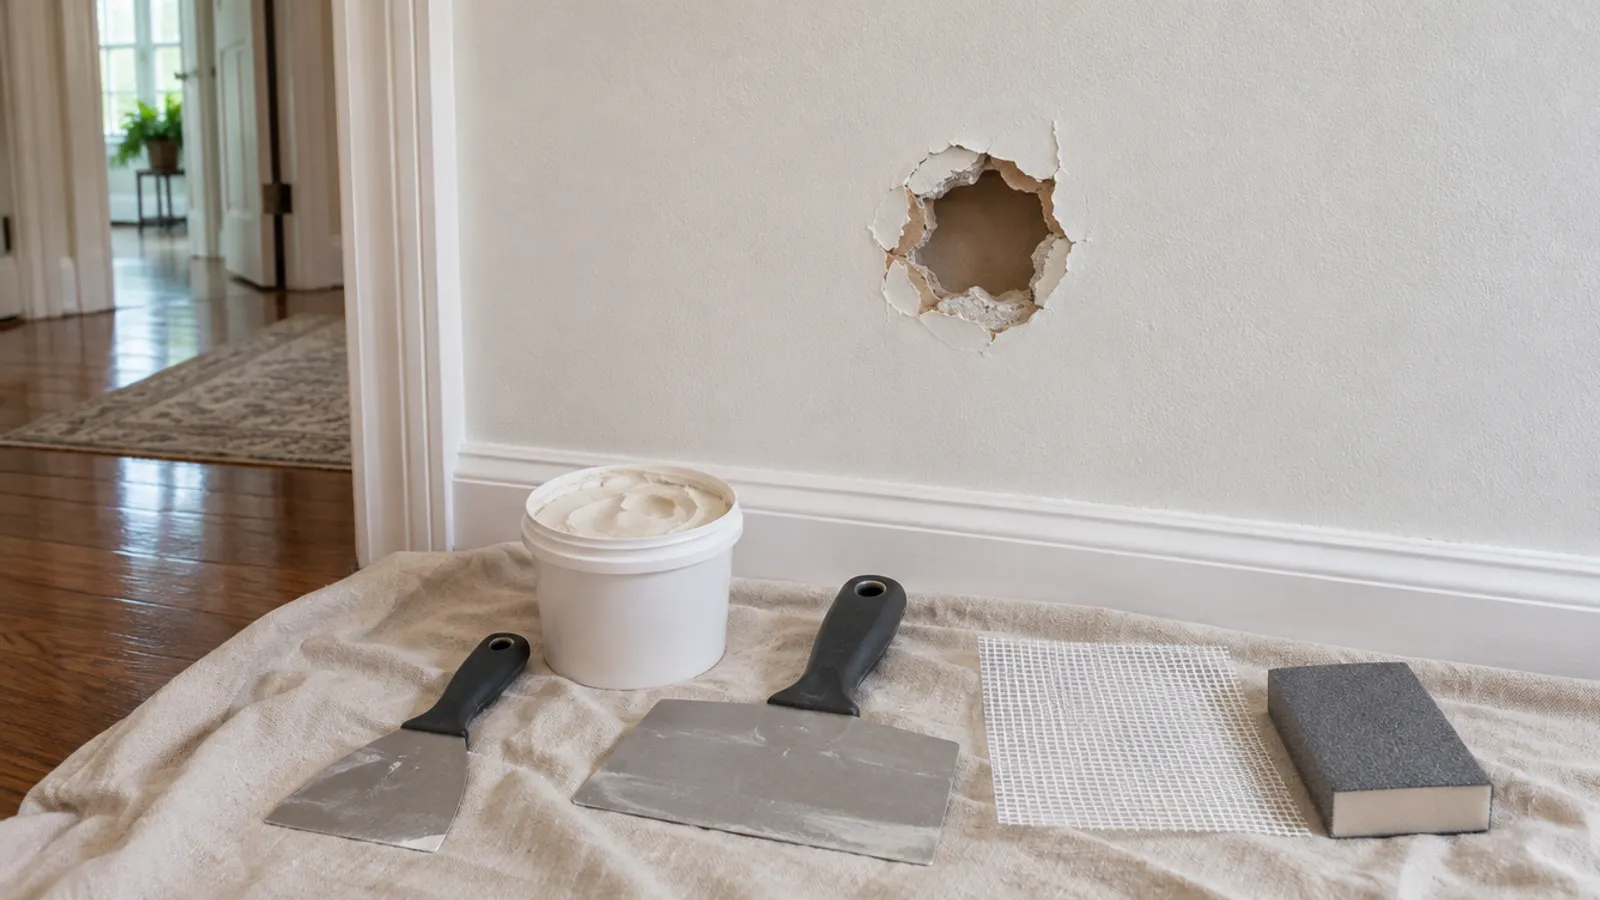
How to patch a hole in drywall depends on its size: fill nail and screw holes with spackle, cover small holes with a self-adhesive mesh patch, and fix bigger holes with a California patch or a cut patch of new drywall fastened to wood behind the wall. Every drywall repair then ends the same way, with thin coats of mud (joint compound), sanding, primer and paint. If the hole is there because you had to reach a valve, cleanout or junction box, don't seal it: close it with a removable access panel instead.
Below is how to patch a hole in drywall at each size: the tools and materials, the steps, and the tips that make a drywall repair disappear under paint.
Which method should you use to patch a hole in drywall?
Look at the hole before you buy anything for the repair. Its size decides the method, and so does what is behind it.
- Nail holes, screw holes and dents. Spackle and a putty knife.
- Small holes, such as a pulled-out wall anchor. A self-adhesive mesh patch that overlaps sound wall on every side.
- Medium holes, where a doorknob or a fist went through. A California patch, or a backed patch with a strip of wood behind it.
- Large holes, or any hole with crumbling edges. Cut back to a clean rectangle, add wood behind the edges, and hang a new piece of drywall.
- A hole you made to reach something. If a valve, cleanout or junction box behind it will need attention again, skip the patch and fit a removable cover.
For most DIY drywall repair jobs, the tools and materials are a putty knife and a wider taping knife, spackle, drywall mud, mesh patches or tape, a utility knife, a keyhole saw, a sanding sponge, a drop cloth, a dust mask, primer and paint. Bigger repairs also need furring strips or plywood offcuts, drywall screws, a drill-driver and new drywall (sheetrock) the same thickness as your wall.
How do you fill nail holes, screw holes and dents?
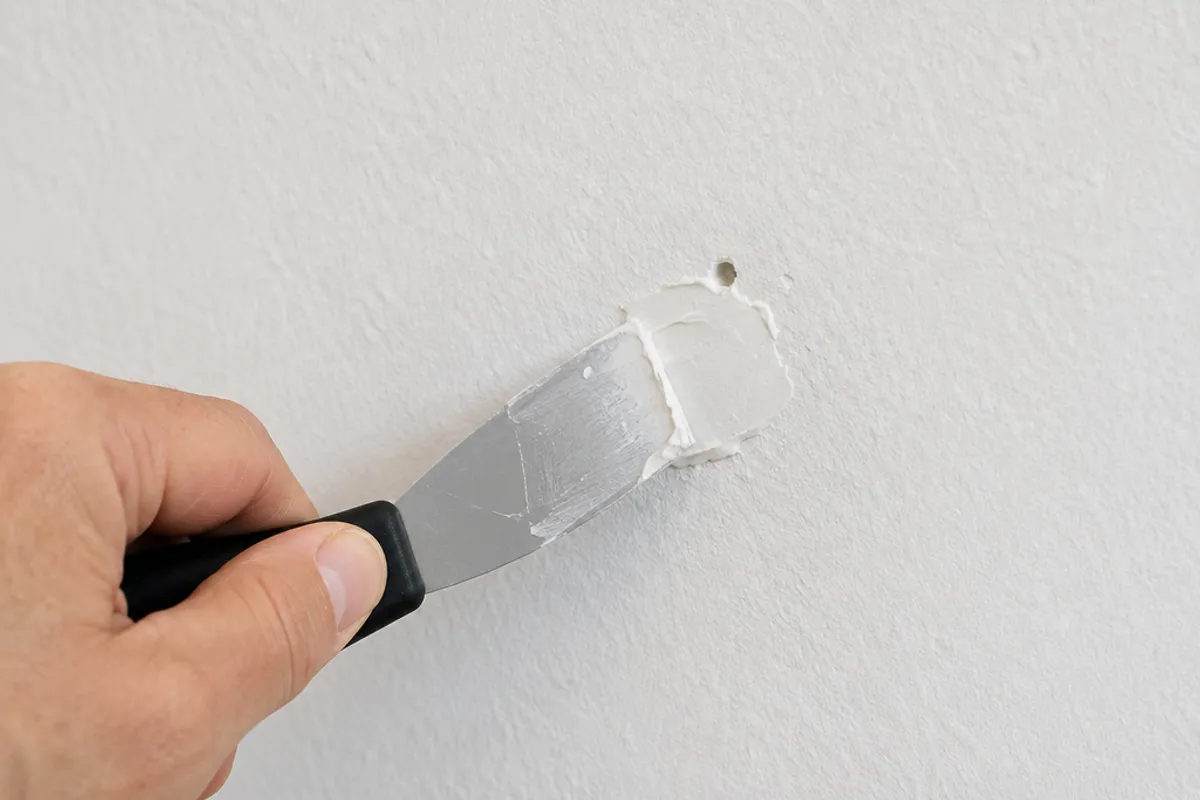
- Scrape off rough edges and loose drywall paper around the hole with the putty knife, so the fill can sit flush.
- If a nail has popped out of the wall, drive a drywall screw into the stud just beside it to pull the board tight, then push the popped head back just below the surface. Fill both.
- Load a little spackle on the putty knife, press it into the hole, then scrape across at a low angle to take off the excess.
- Let it dry fully. Some fillers shrink as they dry, so a deep hole may need a second, thin fill.
- Sand lightly with a fine sanding sponge until you can't feel the edge, then prime and paint.
How do you patch small holes with a mesh patch?
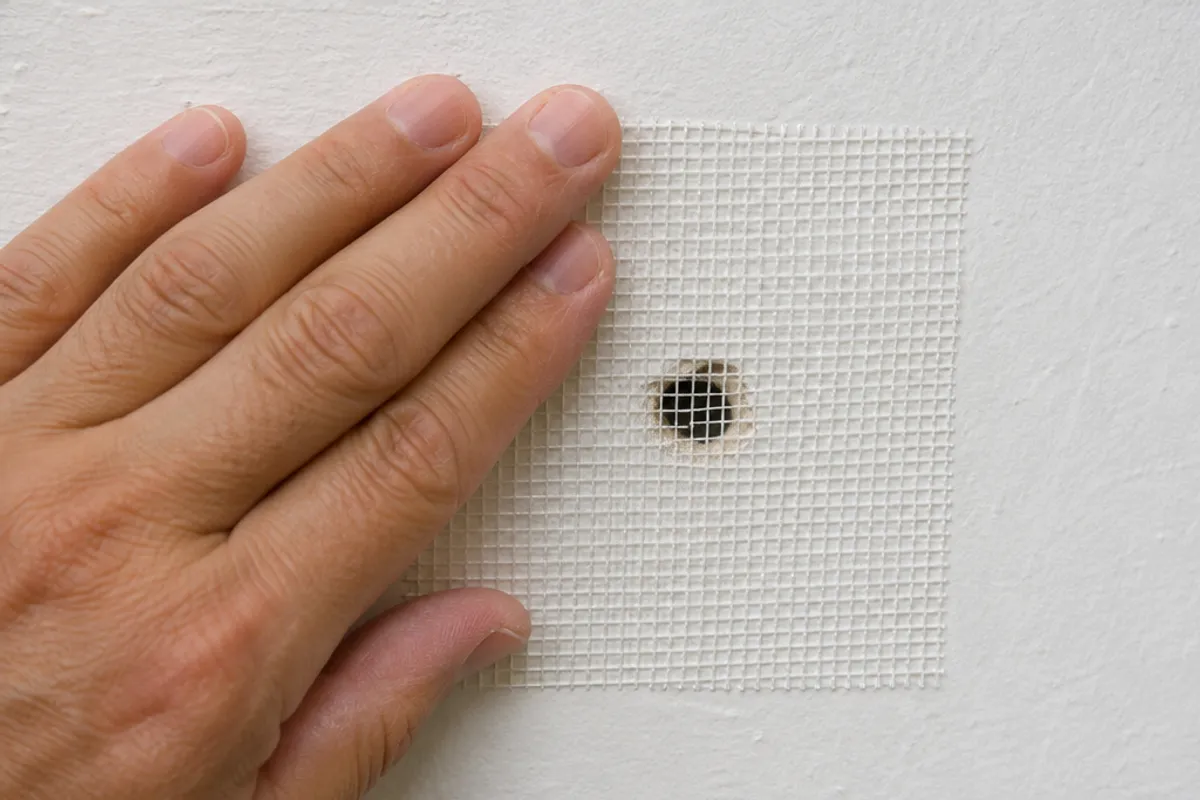
A self-adhesive drywall patch is a square of fiberglass mesh, sometimes with a thin metal plate in the middle, that sticks over the hole and gives the joint compound something to grip. It is the quickest drywall patch, and the easiest repair for small holes.
- Trim loose paper and crumbled gypsum from the edge of the hole with a sharp blade.
- Pick a patch that covers the hole and overlaps sound wall on every side.
- Wipe off the dust, peel the backing and press the patch flat, smoothing it from the center out.
- Spread a thin first coat of mud over the whole patch with a taping knife, pressing it through the mesh and feathering it onto the surrounding surface.
- Let it dry completely, then apply a second, wider coat of mud. Most patches need two coats, and a third if the mesh still shows.
- Sand smooth, prime and paint the repair.
Don't try to hide the mesh in one thick coat of mud: it dries slowly, cracks more easily and leaves a bump to sand down.
How do you fix a medium hole with a California patch?
A doorknob or fist hole is too big for a mesh patch to stay flat. Two methods work.
The California patch uses the face paper of a piece of drywall as built-in tape.
- Look inside the hole with a flashlight for wires and pipes. Then cut the damage to a clean square or rectangle with a utility knife and keyhole saw, and measure it.
- Cut a patch from a scrap of new drywall, bigger than the hole on every side.
- On its back, draw the size of the hole in the center. Score along the lines through the back paper and gypsum, but not the face paper.
- Snap the gypsum outside the lines and peel it off the face paper. You get a plug the size of the hole with a border of face paper around it.
- Test fit the plug and trim it if it binds; it should drop in without forcing.
- Spread mud around the hole and on the wall where the paper border will lie. Press the plug in and smooth the paper flat with a taping knife, squeezing out extra mud and air bubbles.
- Let it dry, then finish it with thin coats as described below.
The backed patch is the screwed-in version. Slide a strip of scrap plywood or a furring strip into the hole, longer than the hole is wide, hold it against the back of the wall and fasten it through the wall on each side. Cut a piece of drywall to fit, attach it to the strip, then tape and finish the repair.
How do you patch a large hole in drywall?
For a hole this big, you are replacing a piece of the wall: cut back to sound drywall, add backing, and screw in a new piece.
Wires and pipes run inside walls. Turn off the power to nearby circuits at the breaker, look inside with a flashlight, and cut with shallow strokes. If you find a damaged wire or pipe, stop and have it repaired, by a licensed electrician or plumber where required. In an older home, old paint can contain lead and old joint compound can contain asbestos, so have them tested before you sand or cut.
- Draw a rectangle around the damage with a level or a square, far enough out that every edge sits on solid, existing drywall.
- For a very large hole, extend the sides to the middle of the nearest stud on each side, so the patch can be fastened to the studs too. A stud finder shows where they are.
- Score the lines with a sharp knife and cut along them with a keyhole saw, keeping the blade shallow.
- Add backing wherever there is no stud. Hold scrap plywood or furring strips, a little longer than the hole, behind each side so they bridge the gap, and fasten them through the existing drywall with drywall screws.
- Check the thickness of the drywall at the cut edge, and cut new drywall of the same thickness, just small enough to drop in without forcing.
- Fasten it to the backing and studs, setting each screw head just below the surface without tearing the face paper.
- Tape the seams with paper tape bedded in mud, or with self-adhesive mesh tape, then finish the drywall repair as below.
Soft, swollen or stained drywall around the hole means water is getting in. Fix the leak first, or the repair will fail the same way.
How do you tape, mud and sand for a smooth finish?
- Tape or mesh. Paper tape makes a stronger joint and suits inside corners, but it has to be bedded in mud or it can blister. Self-adhesive mesh tape is quicker on a flat patch. Either way, cover it completely.
- Joint compound. Premixed compound dries as its water evaporates. Setting-type compound is a powder you mix with water, and it hardens by a chemical reaction within the working time printed on the bag. Follow the label for drying and recoat times.
- First coat. Bed the tape or cover the patch, scrape it fairly tight, and let it dry completely.
- Second coat. Knock off ridges and high spots with the knife, then spread a wider coat past the first, feathering the edges thin for a smooth transition to the wall. Plan on two coats or more, with a little more mud each time, feathered wider than the last.
- Air bubbles and torn paper. Bubbles can come from overworking the mud or spreading it over dust: scrape them off and recoat. If torn paper leaves the brown layer exposed, seal it with primer before you apply more mud.
- Sanding. Sand lightly with a sanding sponge until the patch feels smooth under your fingers, without sanding into the tape or the paper around it. Wear a dust mask, and wipe off the dust with a damp cloth before you prime.
- A light check. Shine a flashlight across the patch, flat against the wall surface. Shadows show high spots and hollows you can't see head-on.
- Primer and paint. Don't skip the primer. Bare compound takes paint differently from the painted surface around it, and an unprimed patch shows as a dull or shiny spot. If the wall is textured, match the texture before you prime.
What are the tips for a drywall repair that doesn't show?
Once you know how to patch a hole in drywall, these habits make the patch disappear:
- Work in thin coats. Several thin coats of mud dry faster, shrink less and sand more easily than one thick one.
- Feather each coat wider than the last. The repair should blend into the wall surface over a wide area, not sit as a raised square.
- Keep the tool clean. Wipe the knife often, so dried bits of mud don't drag lines through the next coat.
- Don't over-sand. Sanding through the face paper leaves fuzz that shows through paint. If it happens, prime the spot and skim it with more mud.
- Contain the mess. Lay a drop cloth and close nearby vents before you sand.
- Keep a scrap of drywall. An offcut from this drywall repair makes the next California patch quicker.
When is an access panel better than a patch?
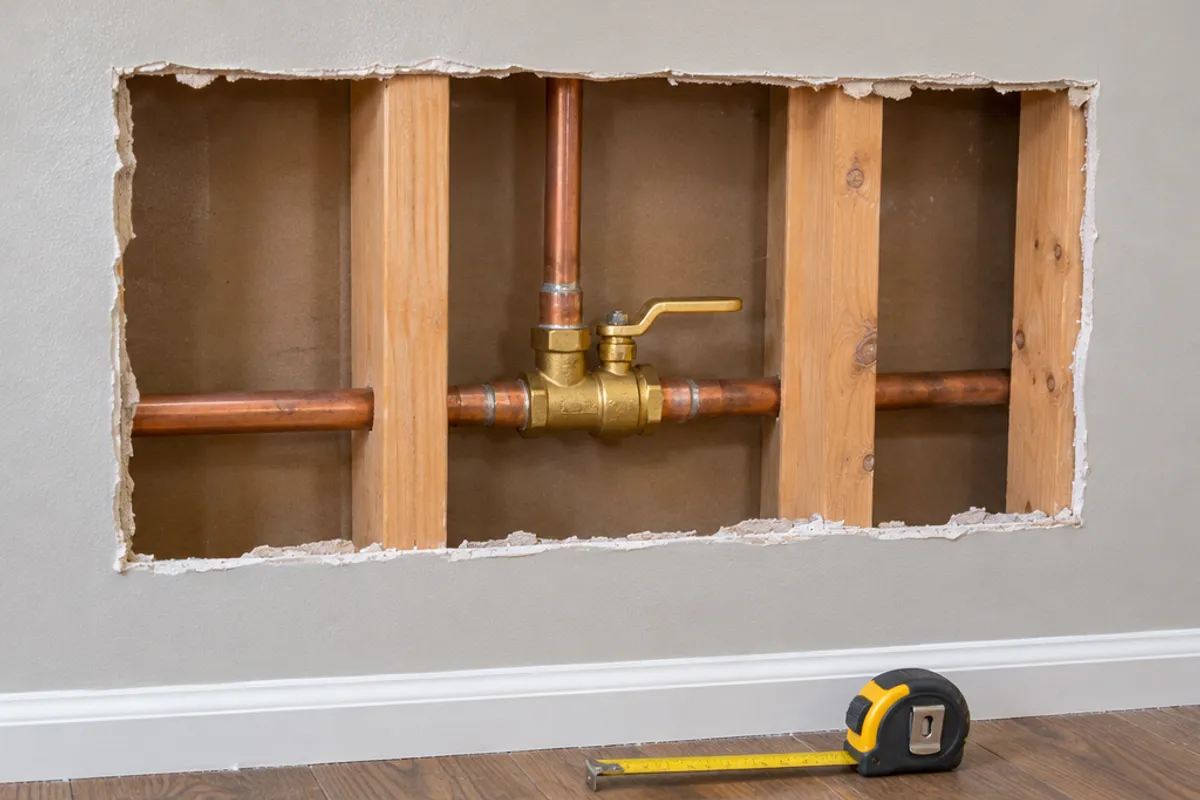
Knowing how to patch a hole in drywall is half the job; knowing when not to is the other half. Sometimes the hole is the point. You opened the wall to reach a shut-off valve, a drain cleanout, a junction box or a tub drain, and someone will need to reach it again.
So don't seal it. Trim the opening to a clean square and close it with a removable panel or a hinged door. Measure the trimmed opening, not the damage, and pick a model whose listed fit includes it. From our catalog:
| Model | Type | Opening | Overall size |
|---|---|---|---|
| SAP0808 | spring-loaded panel | Fits 6 × 6 to 8 × 8 in openings | 10 × 10 in |
| SAP1414 | spring-loaded panel | Fits 10 × 10 to 14 × 14 in openings | 16 × 16 in |
| PAD1212 | hinged door | Maximum service opening 10.35 × 10.35 in (estimated) | 12 × 12 in |
A spring-loaded panel is held by a large wire-loop spring on its back, and its cover sits on the wall around the opening, so the drywall there has to be flat and sound on all four sides. The whole cover comes out when you need in. A hinged door suits a spot you open often. Its frame sits on the wall over a cut-out the size of its service opening, with rounded corners, and is screwed on with the screws that come with the door. Trace the full-size cut-out template on the door's product page.
If your trimmed opening falls between the two square panels' ranges, cut it a little larger so it lands inside the SAP1414's range. If the hole is bigger than any of them, patch the parts of the wall you won't need and leave a square opening in front of the valve or box. That opening has to fit between two studs, so measure the clear space in the stud bay first.
Our panels and doors are not fire-rated, so don't put one in a fire-rated wall, such as some walls between an attached garage and the house. We do not publish water-resistance ratings for them either, so keep them out of a shower or tub surround.
The drywall access panels page shows every model for walls, and the panel finder matches an opening size to a model. To skip the patch entirely and fit a removable panel, see how to install an access panel in drywall.
What do the codes say about patching over valves and boxes?
Never patch over a junction box, and don't bury a valve or cleanout either. The same goes for a pull box. A conduit body needs the same access.
In the US, a drywall patch sealed over a junction box takes away the access NEC 314.29 asks for (NFPA 70, 2023 edition, as revised by Tentative Interim Amendment 23-10): the wiring in the box has to stay reachable, and the code lets a removable cover keep it that way. More in can you drywall over a junction box?
For a valve or cleanout, and for wiring in Canada, your building department or electrical inspector decides what has to stay reachable.
Measure before you order: our guide on how to measure for an access panel shows how, and the access panel size chart compares every opening and cover.