
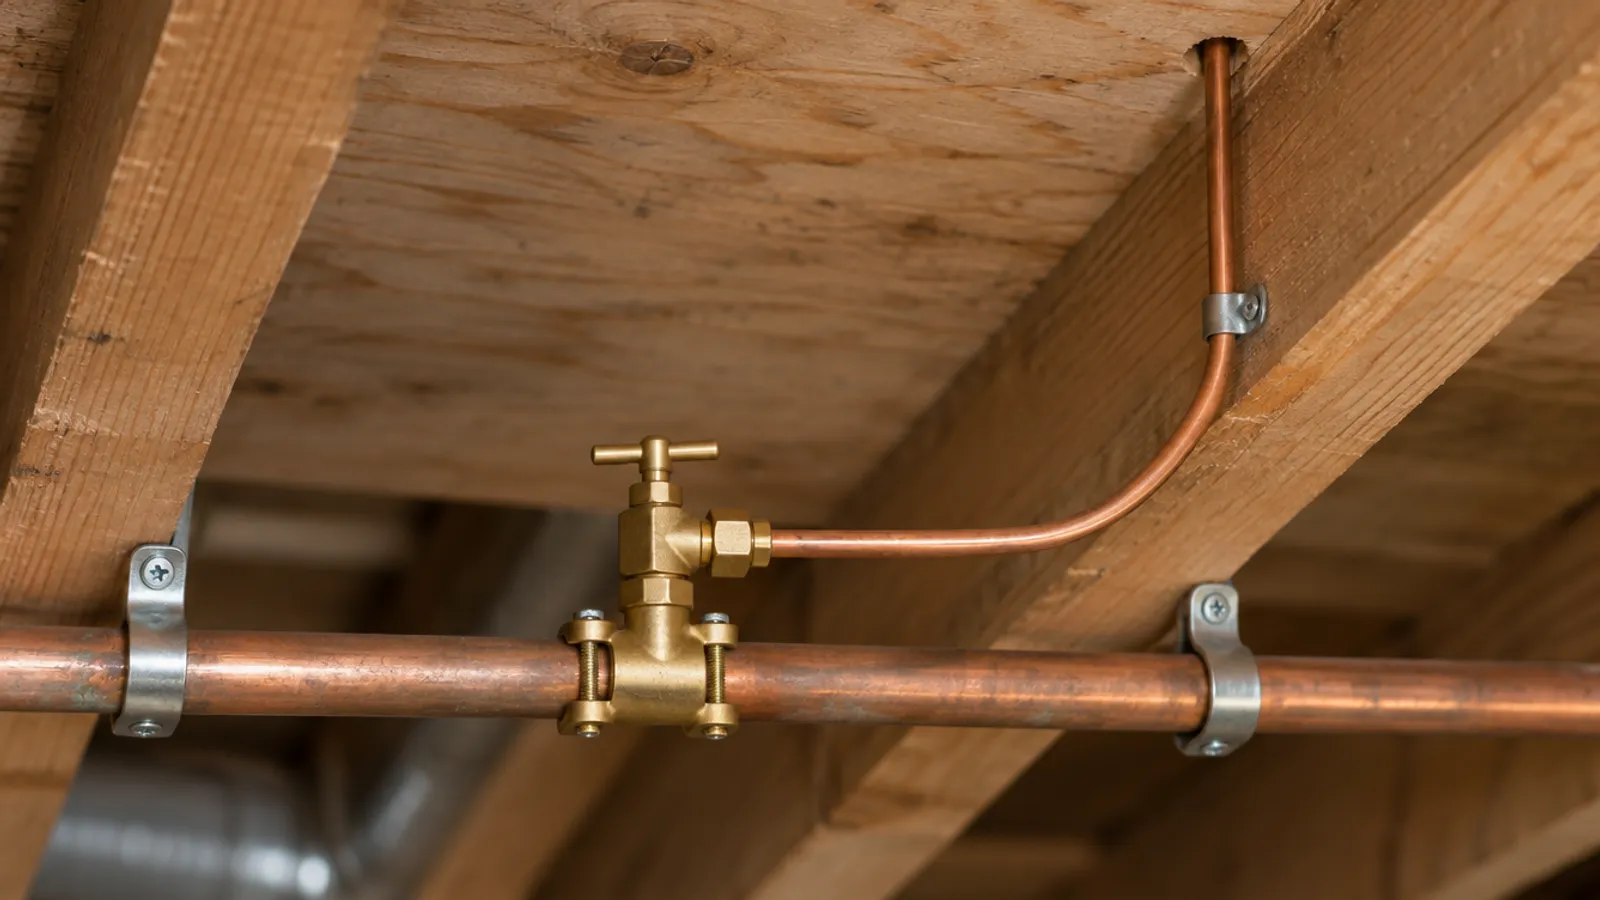
A saddle valve taps into an existing water supply pipe without cutting it. A clamp, the saddle, holds the valve and a rubber gasket against the pipe, and turning the handle drives a needle through the pipe wall. Backing the needle out opens the hole, and water passes into a small tube, typically to an ice maker.
It goes on with no cutting or soldering. Home inspectors flag a self-piercing saddle valve because it is prone to leaking: as one Minnesota inspector puts it, saddle valves have a much higher chance of leaking than a properly installed water valve.
What is a saddle valve made of?
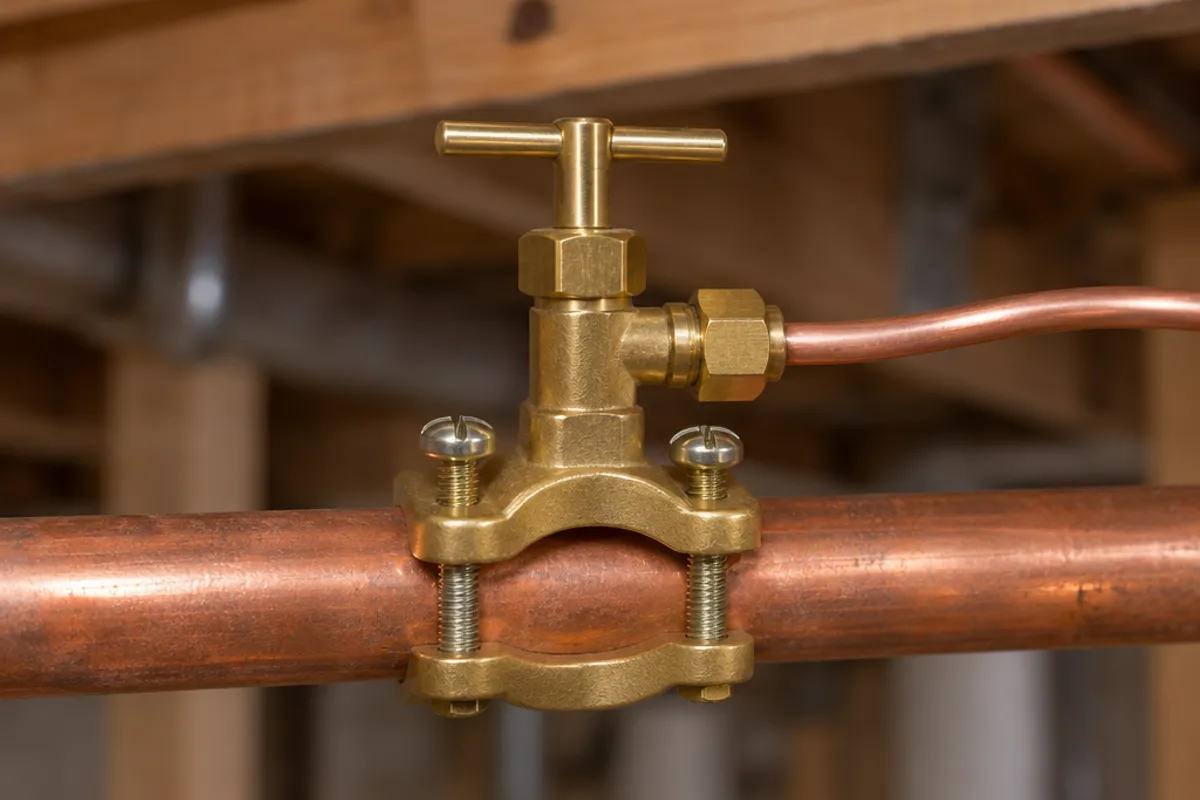
A typical saddle valve has five parts:
| Part | What it does |
|---|---|
| Saddle (clamp and bracket) | Wraps around the water pipe; two screws pull it tight |
| Rubber gasket | Seals the valve body to the pipe around the puncture |
| Needle (piercing lance) | Pierces the pipe, then plugs the opening when closed |
| Handle | Turns the needle in to close and out to open |
| Outlet | Takes the small supply tube to the appliance |
A self-piercing saddle valve creates its own opening. A drill-type saddle valve works the same way once you drill the pipe, and one appliance maker's support page recommends the drill type when possible. As another home inspector points out, the device is really a needle valve: a design meant to gate small amounts of liquid or gas, here put to work to supply water to an appliance.
How does a saddle valve work?
The instruction sheet in one ice maker kit, for a self-piercing saddle valve on copper tube, gives this order:
- Leave the handle alone, and check that the needle sits behind the rubber gasket.
- Fit the saddle on the cold water pipe and tighten the screws evenly: firm, not overtight.
- Connect the tube and run it to the appliance, with a coil behind the fridge so it can be pulled out.
- With the valve installed, turn the handle clockwise until the needle valve seats: the needle has pierced the copper pipe, and the valve is closed.
Turning the handle back out opens the needle valve. The needle withdraws, and water under line pressure can flow through the opening, past the needle and out the outlet.
So a self-piercing saddle valve can stop the water: a seated needle plugs the opening. But that needle and one gasket are the whole seal, and the Minnesota inspector advises leaving an old saddle valve alone, because every time you operate it, the potential for a leak goes up. To turn off the water supply for repairs, close the main water shut-off valve instead.
Why is a self-piercing saddle valve prone to leaking?
Most don't leak, but the odds are worse than with a regular valve:
| Problem | What you notice | Source |
|---|---|---|
| Gasket seal works loose | Water leaks at the clamp or drips from the pipe below | The second inspector |
| Opening too small for good water flow | Small, slow or hollow ice cubes | One maker's support page |
| Leakage in a hidden spot | Moisture damage or mold found late, and bigger repairs | The second inspector |
Why would a tight clamp fail? The second inspector's explanation: copper and plastic pipes expand and contract as the water temperature, or the temperature around the pipe, changes, and the seals at a saddle valve can wear or come loose. With the line always under pressure, a loose seal lets water out.
Where do saddle valves hide in a house?
They are installed on the cold water line nearest the kitchen, wherever the installer could reach it:
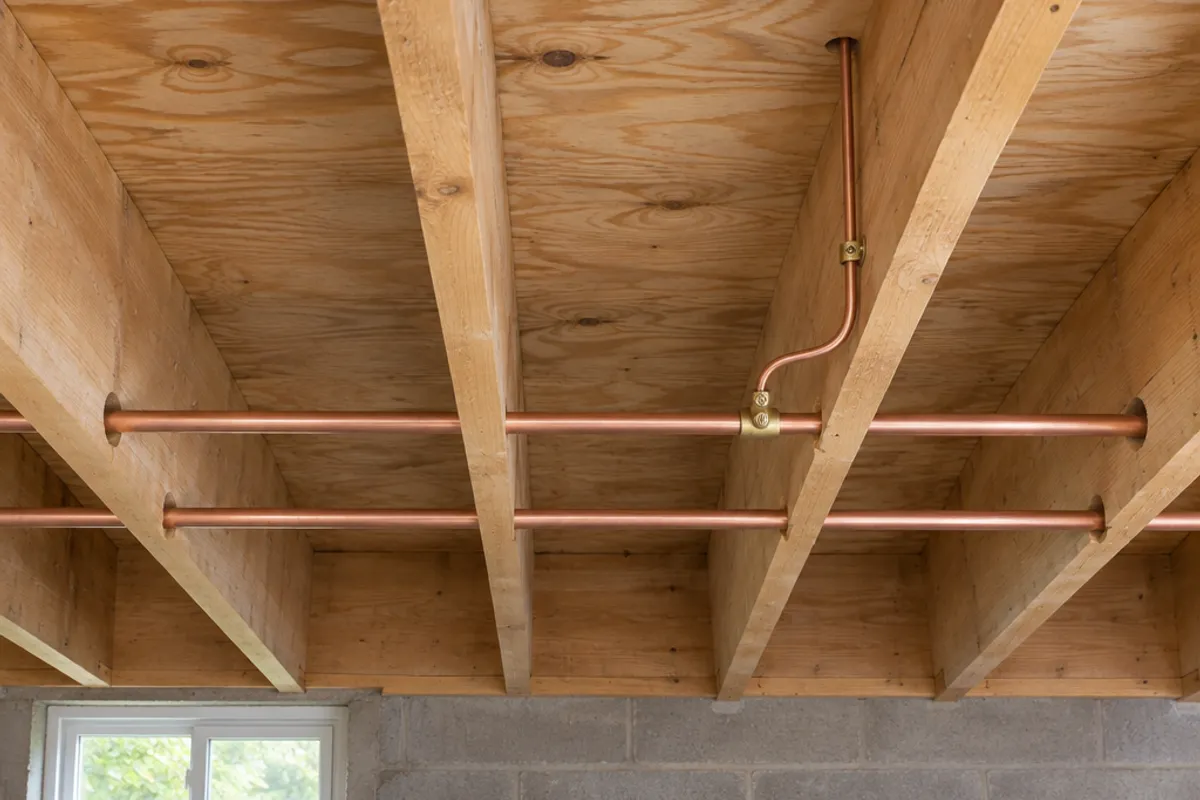
- The basement or crawl space below the kitchen, clamped to a copper water line between the floor joists. One maker's installation instructions for a built-in refrigerator put the valve in a basement or cabinet.
- A cabinet beside the refrigerator, installed on the cold water supply.
- Above a finished ceiling or behind drywall, where the second inspector warns water leaks can go undetected.
To spot an installed self-piercing saddle valve, look for a small valve on a clamp around a larger copper pipe, with a thin copper or plastic tube leaving it.
Are saddle valves legal?
It depends on where you live. Massachusetts' Uniform State Plumbing Code, 248 CMR 10.14 (the current text on mass.gov, read November 2026), lists saddle valves first among its prohibited valves and connections. Those installation instructions repeat that ban and tell everyone else to make sure a saddle type valve complies with local plumbing codes before buying one. Rules differ by state, province and city, so if you are concerned, ask your local plumbing inspector before you add one or keep one already installed.
Saddle valve vs tee: what should replace it?
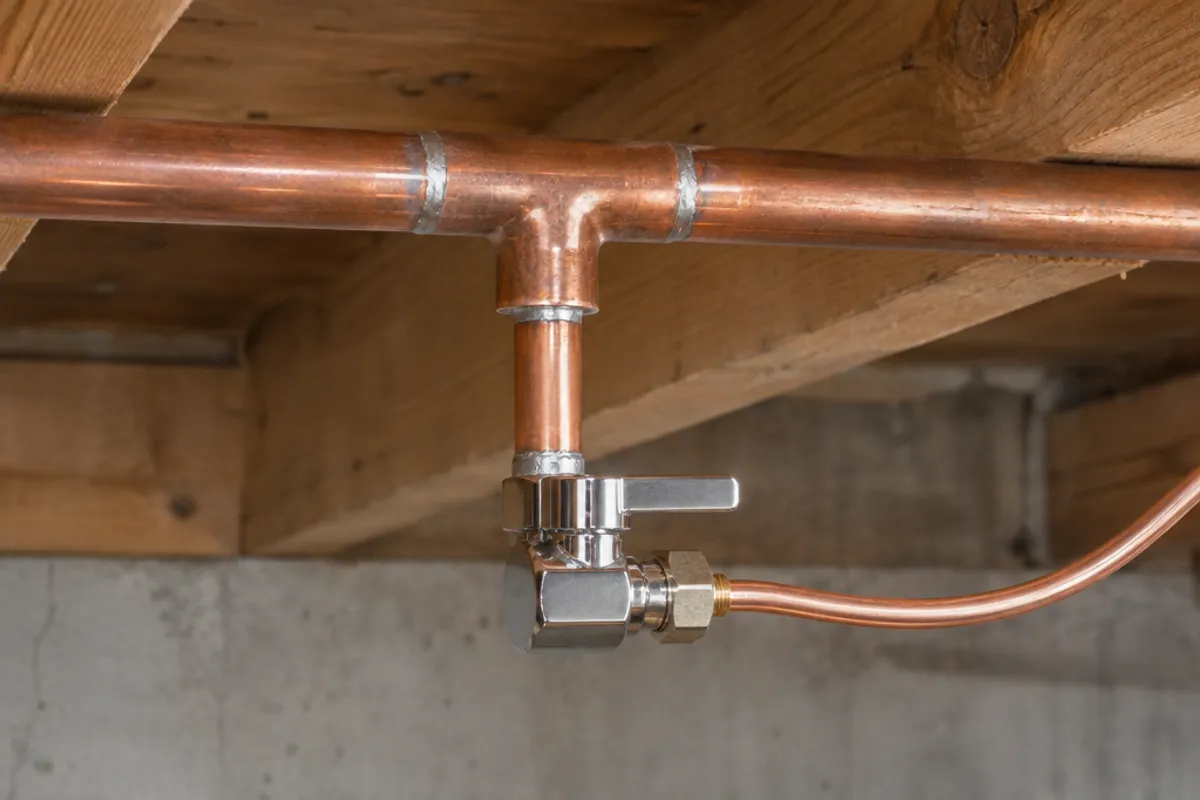
The Minnesota inspector's advice for any ice maker hook-up: tap off the existing water line with a proper tee fitting and have a proper shutoff valve installed.
| Feature | Self-piercing saddle valve | Tee and quarter-turn stop |
|---|---|---|
| How it joins the pipe | Clamp and gasket over a pierced opening | Pipe cut, tee joined into the line |
| Shutting off | Turn the needle valve closed | A quarter turn of the lever |
| Inspector's view | Flagged | Much lower potential for leaks, he says |
His basic steps to replace a saddle valve with a more reliable tee:
- Turn off the water supply to the house and drain the lines.
- Remove the self-piercing saddle valve. Its puncture stays in the copper pipe.
- Cut the copper line just before and just after where the saddle sat.
- Bridge the gap with a tee. On copper sweat pipe that means solder; a push-to-connect tee needs no torch.
- Fit a short stub of pipe in the tee's branch, then the stop valve, then connect the ice maker tube to the stop's compression outlet and tighten its nut.
- Turn the water on and check every joint you installed for leaks.
Will the stop end up above a finished ceiling? Read the fitting's instructions first. One stop maker's sheet limits its push-connect inlets to exposed locations, and a panel doesn't turn a ceiling cavity into one; see push-to-connect fittings behind drywall.
Soldering between joists puts a flame near wood and wiring. Use a licensed plumber where your area requires one for plumbing work on the water supply, and keep the water off until every fitting is installed.
How do you keep the new shutoff valve reachable?
Installation instructions ask for it. The refrigerator sheet linked above says an easily accessible shut-off valve in the water supply line is required, located where it will be easily accessible. The stop maker's sheet says its stops are for accessible locations only and should be inspected annually.
Once installed in an unfinished basement, the stop stays in the open. When the ceiling under the kitchen is finished, put an access door or panel below the stop, on the dry side, centered so a hand can reach the lever:
- Hinged door, for a stop you open and inspect: PAD0808 hinged door: maximum service opening 6.35 × 6.35 in, overall 8 × 8 in
- Spring-loaded panel, for a flush ceiling: SAP0808 spring-loaded panel: fits 6 × 6 to 8 × 8 in openings, overall 10 × 10 in
Our plastic access panels and doors are not fire-rated, and we publish no water-resistance rating for them, so don't fit one in a fire separation, such as the wall between a house and an attached garage.
For a drain-down valve in the same kind of ceiling, see what a stop and waste valve is. More sizes are on the plumbing access panel page.
Measure before you order: our guide on how to measure for an access panel shows how, and the access panel size chart compares every opening and cover. How to install an access panel in a ceiling covers fitting it.