
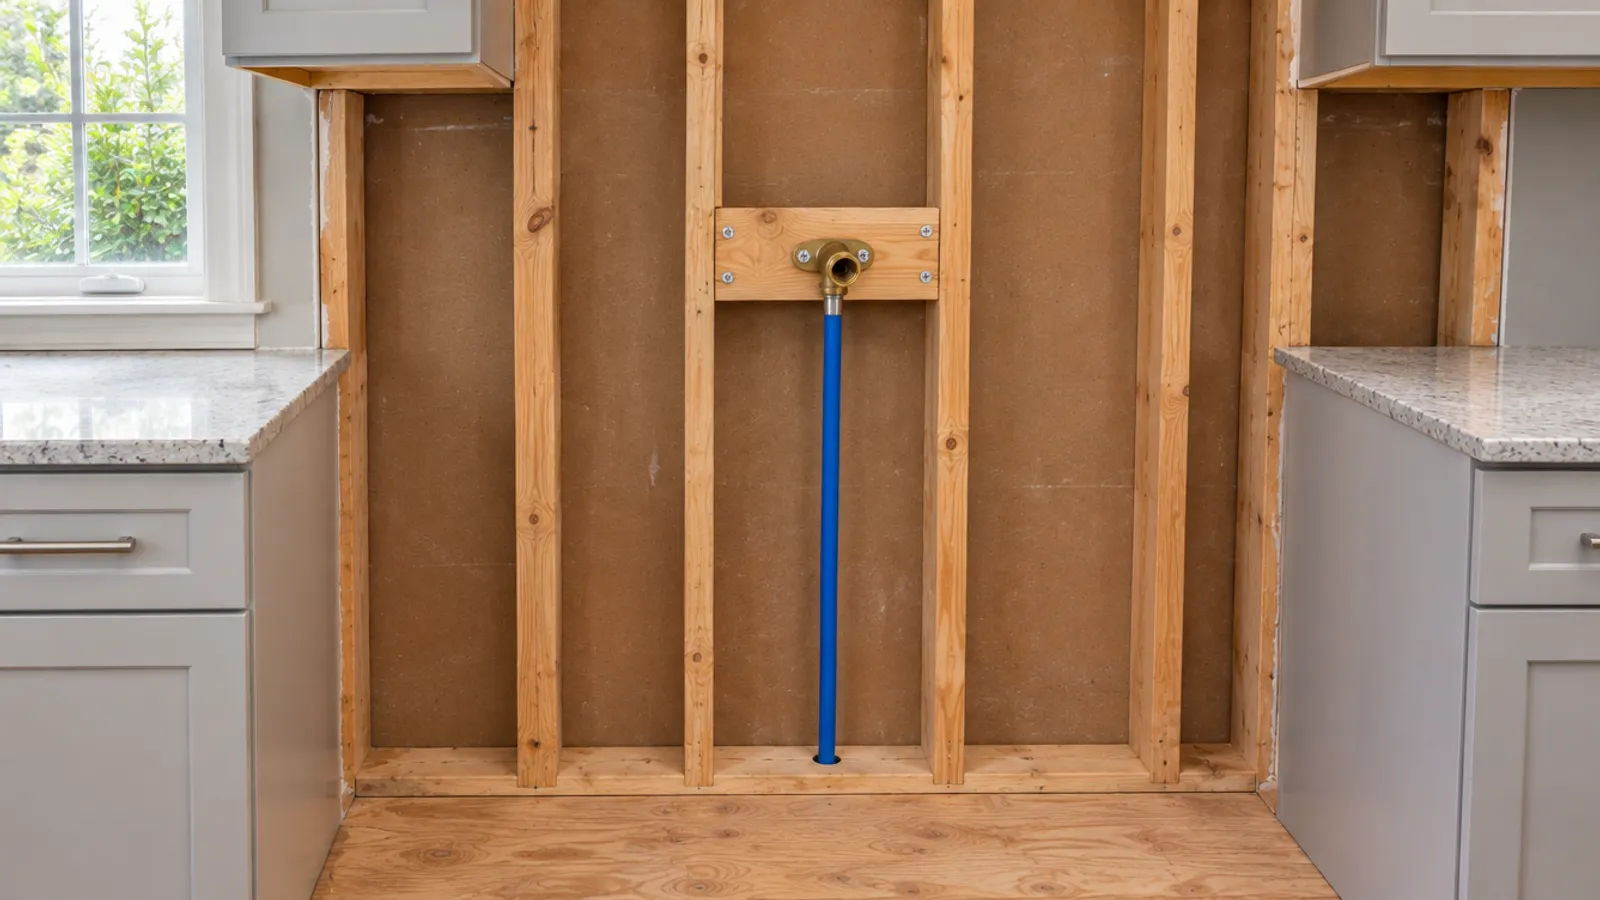
Pot filler installation means running a cold water line inside the wall behind the stove, putting a shut-off valve where you can reach it, and bracing a threaded stub-out at the right height. Test the line for leaks before the drywall and tile go on, then mount the pot filler faucet and check every connection.
A deck-mount pot filler is easier to install: it sits on the countertop beside the stove and connects underneath like a kitchen sink faucet. Either way, plan the project around the shut-off valve, because its place decides whether a later repair is a quarter turn or a torn-out tile backsplash.
Wall-mount or deck-mount: which pot filler is easier to install?
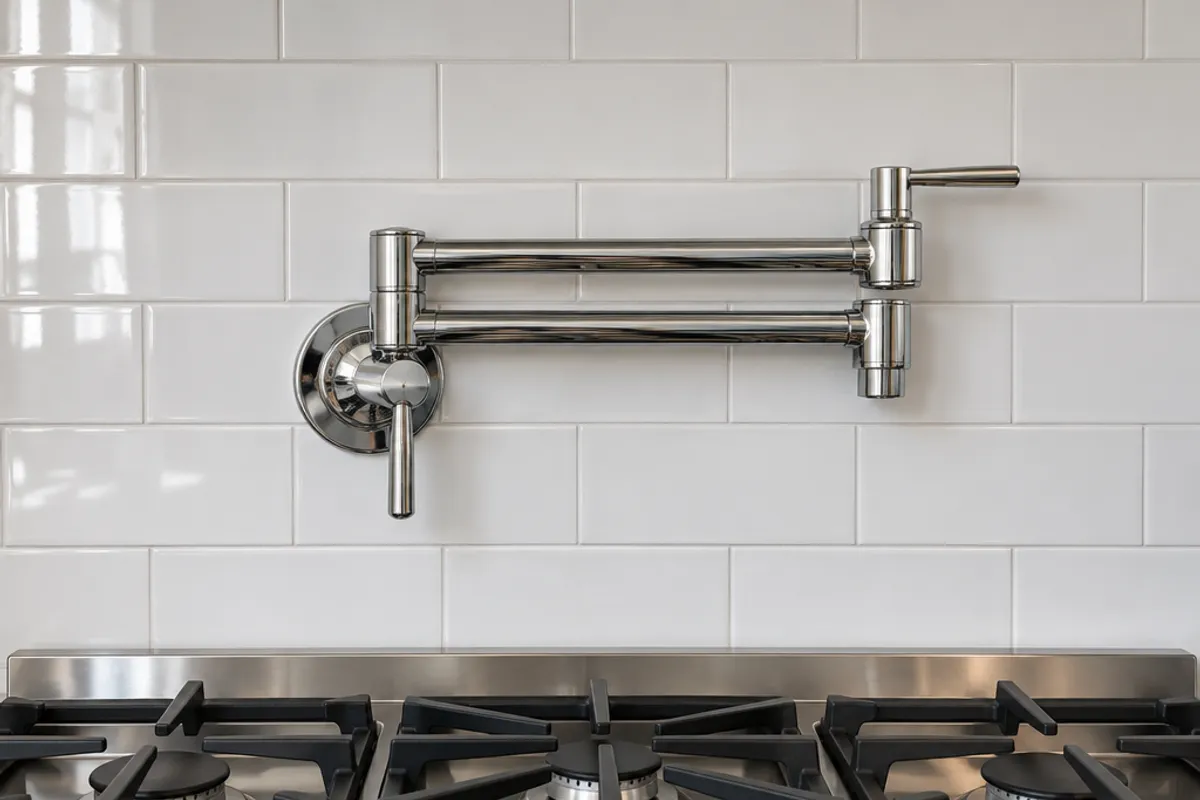
A wall-mount pot filler puts a folding arm on the backsplash, filling pots right where you're cooking. It needs a supply line inside the wall, so a kitchen remodel is the perfect time to install one. A deck-mount pot filler needs only a hole in the countertop, so it suits a finished kitchen. Both connect to the cold water supply, but only the wall-mount pot filler needs new plumbing in the wall.
| Feature | Wall-mount pot filler | Deck-mount pot filler |
|---|---|---|
| Where it mounts | The backsplash above the stove | The countertop beside the stove |
| Plumbing | A new cold line in the stud bay, ending in a braced stub-out | A supply hose from a cold line in the cabinet below |
| Drywall and tile work | Open the drywall, then patch it and finish the tile | None; drill the countertop (stone and quartz need a diamond hole saw) |
| Shut-off valve | Has to be planned: in a cabinet, in the next room, or below the floor | Usually a stop valve in the cabinet below, like a sink |
How do you plan the water line behind the stove?
The pot filler plumbing is one cold line, branched with a tee from the nearest cold supply: often the line to the kitchen sink, or a cold line in the basement below the kitchen. Tapping the same line for a fridge? See why inspectors flag saddle valves. PEX and copper are both common. Most kitchen pot fillers are made for cold water only, because you heat the water on the stove anyway.
Before you install a pot filler, check these:
- The rough-in sheet. Read it before the drywall goes up. It gives the stub-out fitting, the nipple length and how thick the finished wall can be, tile included. A stub-out set for bare drywall may not reach through the finished wall.
- Determining the height. The spout has to clear your tallest pot on the burners, and the folded arm has to clear the range hood: too low, the spout can hit tall pots; too high, the arm can hit the hood. Use the manufacturer's height guidance, then check it against your own cooking pots. Write the chosen height on the rough-in sheet for the plumber.
- Side to side. Many people center the pot filler over the stove, but a spot to one side can suit the burners you use most. It is a matter of preference: swing the arm on a plan view of the stove to see that it reaches the front and back burners.
- The route. Find the studs and any wiring or gas line first, and don't notch or drill framing beyond what your local code allows. Use one continuous length of pipe where you can, so you don't create hidden joints.
- Exterior walls. In a cold climate, such as Alberta, the Maritimes or the northern US states, a pipe in an exterior wall can freeze. Keep it on the warm side of the insulation, or run it through an interior wall; our guide on whether PEX pipe can freeze explains why PEX is not immune.
Where should the pot filler shut off valve go?
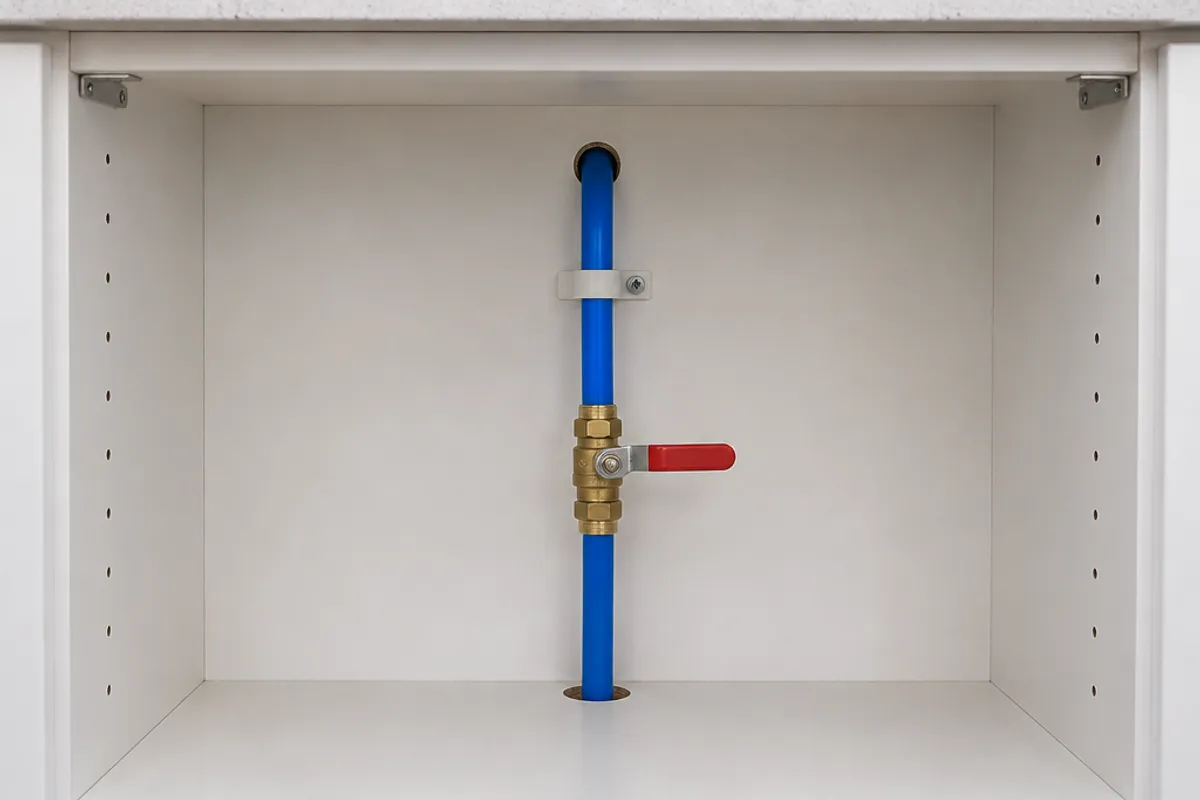
Put the pot filler shut off valve where you can reach it without moving the stove or breaking tile. A pot filler's own handles, usually one at the base and one near the spout, only stop the flow at the faucet. A separate valve on the supply line lets you replace a cartridge or fix a leak at the stub-out without shutting off the whole home every time.
Good places for it:
- In the base cabinet beside the range. Route the line through the kitchen cabinet and install a quarter-turn valve there, like a sink's stop valve.
- On the back side of the wall. If a pantry or closet backs onto the stove, put the valve there, where heat is not an issue, behind a hinged access door.
- Below the floor. In an unfinished basement below the kitchen, a valve where the branch leaves the main cold line works too. Label it.
Never bury the pot filler valve in the wall directly behind the stove or the backsplash: reaching it would mean pulling out the stove and cutting tile, next to the heat of the burners. Our doors are not fire-rated, so they belong on the back side of the wall or inside a cabinet, never behind a stove.
In drywall, install a small hinged door to keep the valve in reach. Mark the hole from the door's full-size cut-out template, then screw the frame over it with the screws that come with the door.
| Hinged door | Service opening and cut-out | Overall size | Suits |
|---|---|---|---|
| PAD0808 | 6.35 × 6.35 in, rounded corners | 8 × 8 in | Reaching a quarter-turn valve and its handle |
| PAD1212 | 10.35 × 10.35 in (estimated), rounded corners | 12 × 12 in | Room for two wrenches at a connection |
A valve that sits unused for most of its life can stick or seep; see shut-off valve leaking when closed for fixes, and where the water shut-off valve is to find the main one.
How do you install a pot filler, step by step?
These steps are for a wall-mount pot filler installed on a new line during a kitchen remodel. Follow the manufacturer's instructions where they differ.
- Shut off the water at the main valve and drain the lines from a faucet below the work.
- Mark the center and height with a level, find the studs and open the drywall down to where the line comes in.
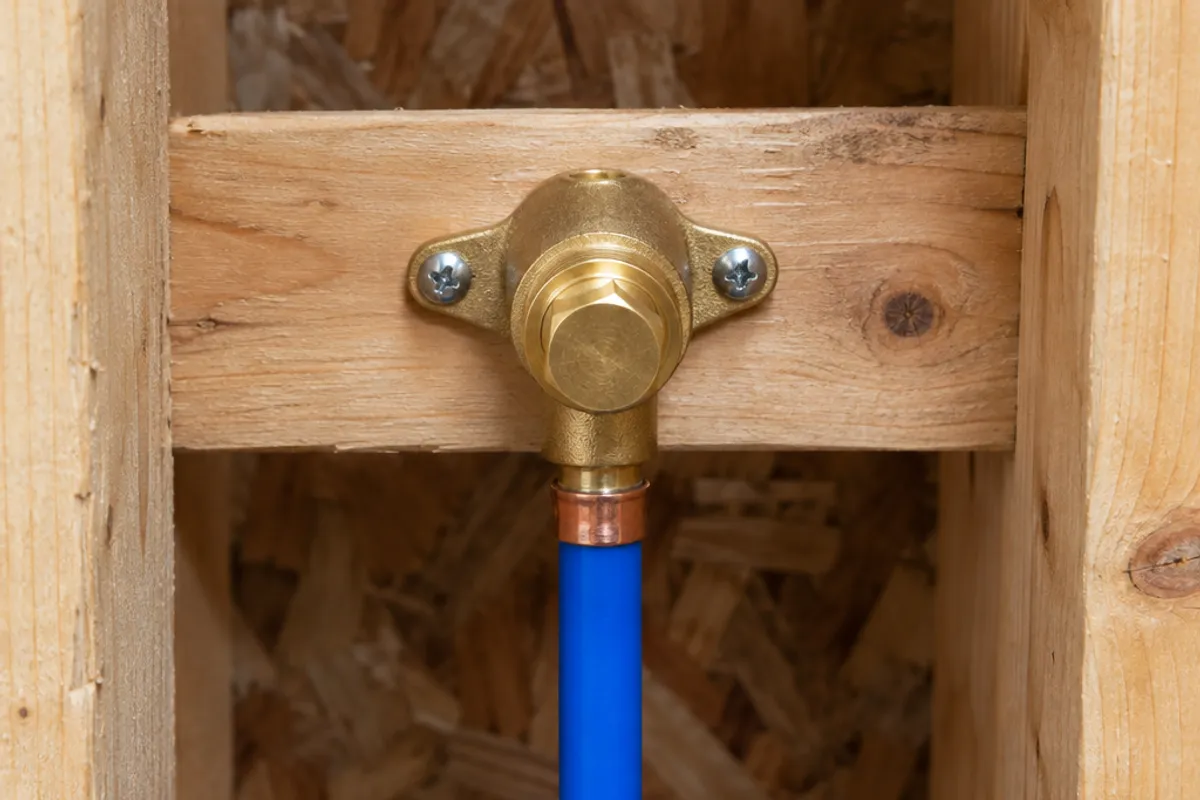
- Screw a wood block level between the studs at the stub-out height, set back as the rough-in sheet says.
- Install a drop-ear elbow on the block with screws, its threaded outlet facing the room, so it stays in place when you mount the faucet.
- Run the line from the tee, through the shut-off valve and up the stud bay, and connect it to the elbow. Support the pipe along the way.
- Thread a test plug into the elbow and test the line (next section) before you close the wall.
- Hang the drywall and complete the tile backsplash, leaving the stub-out clear.
- Install the pot filler faucet: thread its nipple into the elbow, with PTFE tape or pipe-thread sealant on the male threads only.
- Slide the flange over the nipple, then tighten until the pot filler arm sits level and points the right way. Wrap the wrench in a cloth to protect the finish.
Sealant on the female threads gets pushed inside the fitting as the nipple tightens, and it can create an oily taste in the water. If the first pots of water smell or taste oily, take the faucet off and clean the fittings.
Soldering copper means a torch next to the studs, the insulation and maybe a gas line. Use a licensed plumber where your area requires one, and ask your local building department whether a new supply line needs a permit.
How do you test a pot filler for leaks?
Test the pot filler connections twice, then look again the next day. A leak found after the backsplash tile is on costs the tile.
- Before you close the wall. Once the rough-in is complete, turn the water on slowly with the plug in and check the connections at the tee, the valve and the elbow. Leave the water on and the line under pressure while you work, then check again after some time with a dry paper towel. Your inspector may want a specific test.
- After you install the faucet. Open the shut-off valve and turn both handles on and off. A drip at the flange means the threaded joint needs resealing. Swing the pot filler arm over each burner with your tallest pot in place to check it clears.
- The next day. Look inside the kitchen cabinet with the valve, and at the basement ceiling below; a slow leak shows up there first. The job is complete when everything stays dry; for other signs, see water leak behind a wall.
Do you need a plumber or a permit to install a pot filler?
A deck-mount pot filler installed on an existing cold line is close to a kitchen faucet swap and a fair DIY project. A new line inside a wall is new plumbing, and many areas require a permit or a licensed plumber for it; a plumber can also help with determining the route. Before the wall is opened, ask your local building department what it requires for the new line and for reaching its shut-off valve.
Plan the opening for the pot filler's shut-off valve before you install the drywall: see our guide on how to measure for an access panel, then compare hinged doors on the access doors page, options for pipes on the plumbing access panels page and every size in the access panel size chart.