
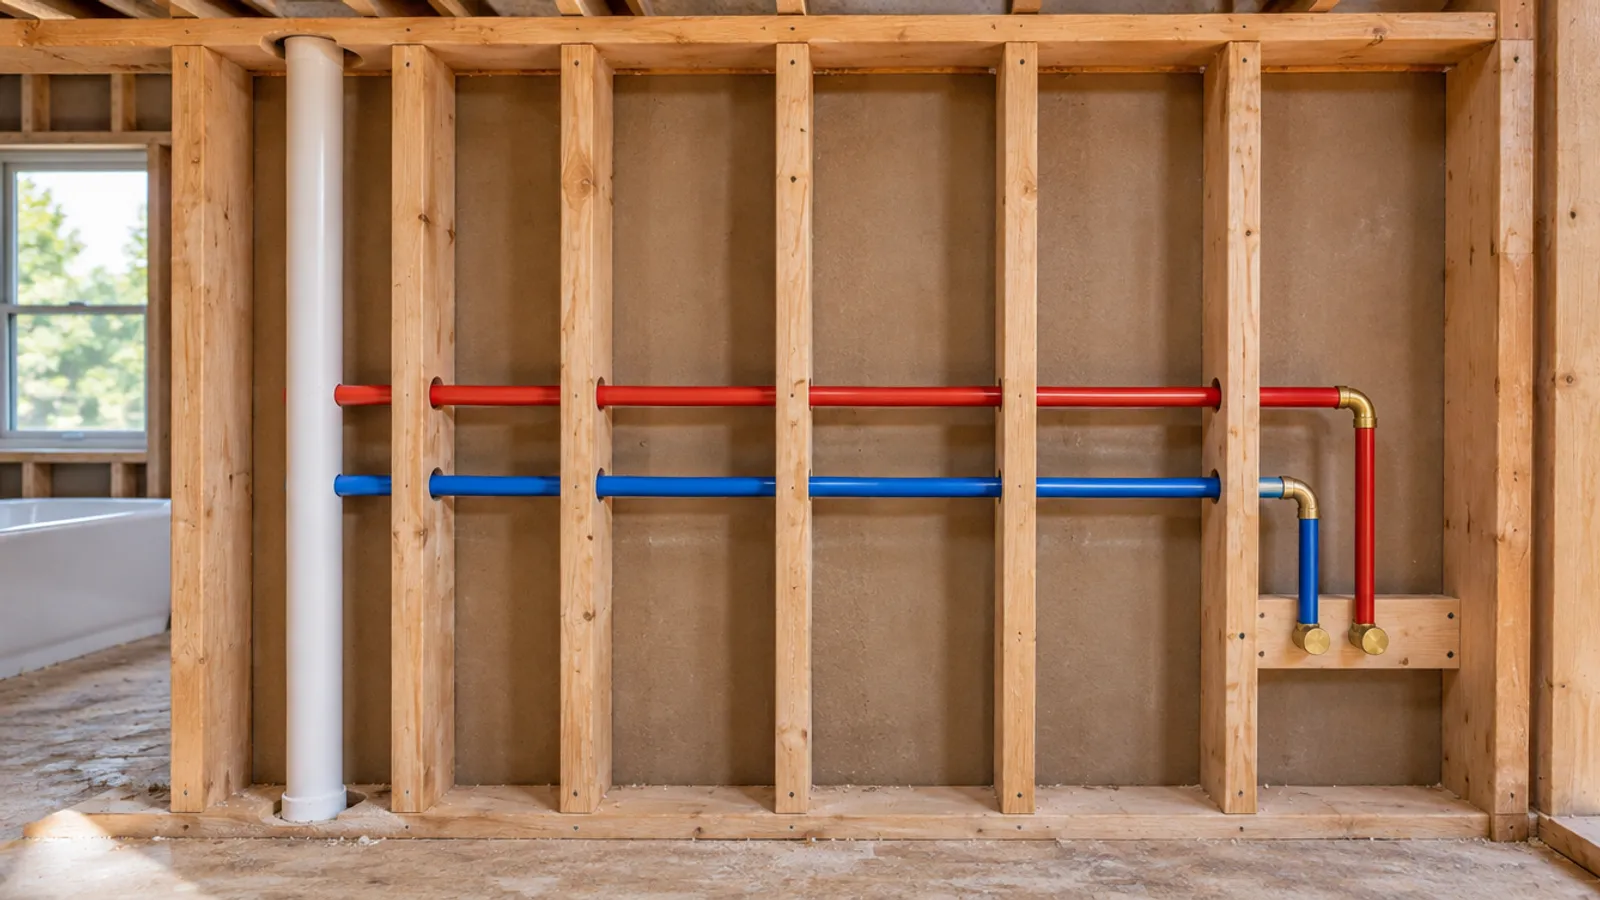
Rough-in plumbing is the stage of a construction project or remodel when the plumber runs the drain lines, vents and water supply lines through the open walls and floors and ends each one at a capped pipe where a fixture will go. It is tested and inspected before anything is covered; sinks, toilets and faucets come later, at finish plumbing.
Rough-in plumbing also fixes where every shower valve, tub drain, cleanout and shut-off will sit for the life of the house, so it is the point in the construction process to plan how you will reach them in the future.
What is rough-in plumbing, and what does it include?
Rough-in plumbing covers the drain, waste and vent system and the water supply system: every pipe that ends up hidden behind finished surfaces. In new construction on a slab, the underground pipes are installed before the concrete, and the rest of the plumbing system follows once the framing is completed. In a remodel project, the plumber strips the room to the studs and reworks the lines for the new layout.
| Part | What goes in at rough-in |
|---|---|
| Drain and waste lines | Horizontal drains under the floor or between the joists, sloped toward the building drain, and the vertical stacks they tie into |
| Vent lines | Pipes connected to each fixture's drain that tie into the vent system and run out through the roof |
| Water supply lines | Hot and cold water lines from the main and the water heater to each fixture |
| Bathtub and mixers | Mixing valve bodies, and often the bathtub, installed with its drain and overflow |
| Cleanouts | Cleanout fittings on the drain lines and at the base of the stacks |
The utility connections, the water service from the meter and the sewer or septic line, are typically separate jobs with their own inspections, and so is gas piping. Hot-water heating pipes, where a house has them, are roughed in at the same stage.
How is rough-in different from finish plumbing?
Rough-in plumbing is the hidden part of the process; finish plumbing is the installation of everything you see and use. "Rough" means unfinished, as in the rough opening framed for a window.
| Compare | Rough-in | Finish plumbing |
|---|---|---|
| When | After framing, before insulation and wallboard | After wallboard, tile and paint are completed |
| What is installed | Drain, vent and water lines, in-wall mixers, often the bathtub | Toilets, sinks, faucets, shut-offs, trim |
| Inspection | Rough-in, with the lines tested while visible | Final plumbing, with every fixture working |
The finish plumbing phase is short by comparison: each fixture is connected to the pipe ends left at rough-in. If one of those ends is in the wrong place, fixing it means opening a finished wall.
Where does rough-in fall in the construction process?
Your plumbing contractor and the building department set the exact sequence, but most new construction projects follow this process:
- Underground pipes. Under a slab or in a crawlspace, the plumber lays the drain lines and any water lines below the floor, tests them and has the inspector check them before they are covered.
- Framing is completed, and rough-in plumbing above the floor can begin.
- Rough-in above the floor. The plumber will drill holes through studs, plates and joists, run the horizontal drains and vent lines, finish installing vents through the roof, run the water lines, and install the valve bodies and the bathtub.
- Protection and leak checks. Steel plates cover lines that pass through holes near the face of a stud, so a screw can't reach them. The water lines are put under pressure, and the plumber will fill the drain lines with water to check every connection for leaks.
- Rough-in inspection, while everything installed is still visible.
- Insulation, wallboard, tile and paint.
- Finish plumbing, then the final plumbing inspection.
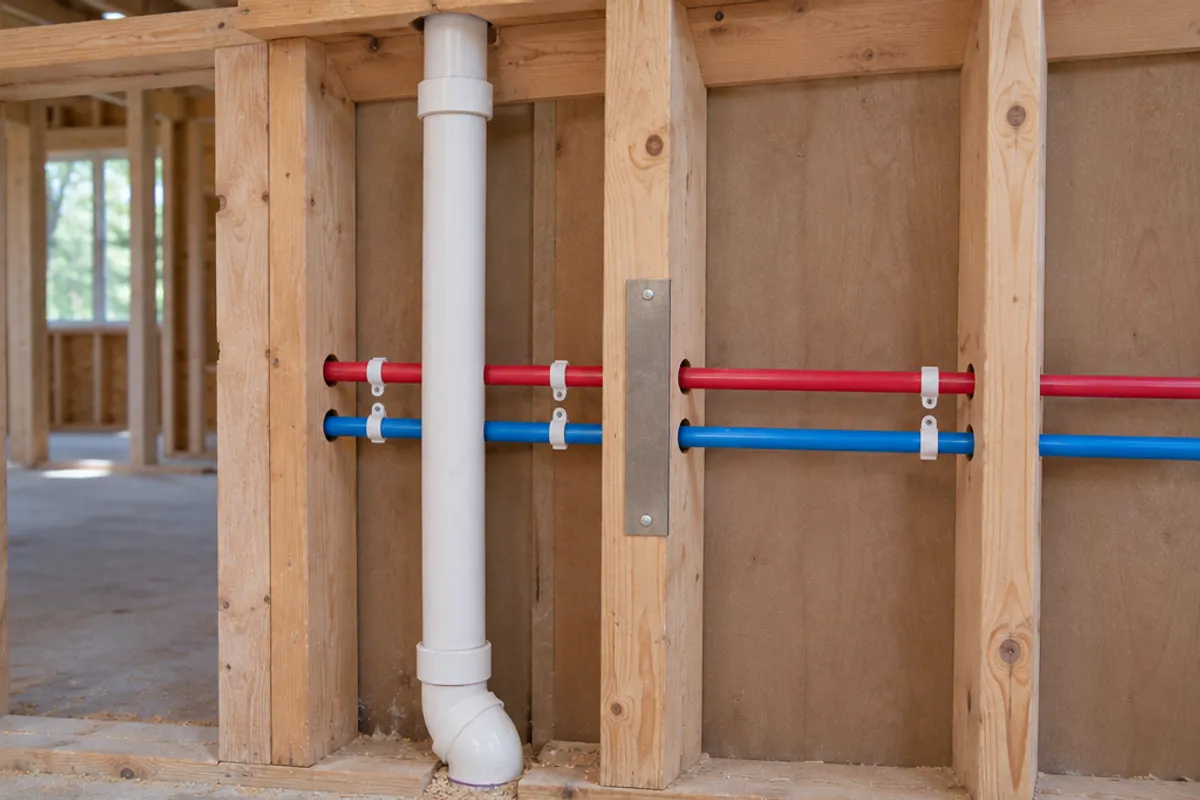
Henrico County, Virginia, publishes this order in its plumbing inspection matrix (revised October 25, 2023; read on 2026-11-17): a groundwork inspection before any underground piping is covered, a plumbing rough-in inspection before the piping is concealed by insulation, walls, floors or ceilings, and a final plumbing inspection once the fixtures are installed and working. It lists separate inspections for the utility connections too: the water service and the sewer service.
On new construction, plumbing contractors typically come back twice: once for the rough-in and once for finish plumbing. The heating and electrical contractors drill their own holes through the same studs at about the same time, so agree early which stud bays each trade gets, and keep clear the bays you will want to open later.
What does a rough-in plumbing inspection check?
It is the plumbing inspector's look at the plumbing system while every pipe can still be seen; the plumber or plumbing contractor usually books it under the permit. For the rough-in plumbing inspection, Henrico's matrix lists:
- the water, drain and vent piping, for size, fittings, materials and location;
- a pressure test on all the water distribution piping;
- every vent installed and extending through the roof, with its roof collar;
- pipe protection, and a water test on the waste piping.
Other building departments check other parts of the system, so ask yours for its list, and have your plumber on site when the inspector comes. If the inspector finds a problem, the plumber corrects it and the process repeats before anything is covered. Only once the inspection is completed and passed can the insulation and wallboard go up. In Canada, plumbing permits come with inspections too: in British Columbia, Alberta, Quebec or the Atlantic provinces, ask the office that issued yours which ones apply to your project.
Rough-in work includes soldering, connections to the building drain and, in many houses, gas piping. Use a licensed plumber where your state or province requires one, and get the permit before the work begins.
What are stub outs in plumbing?
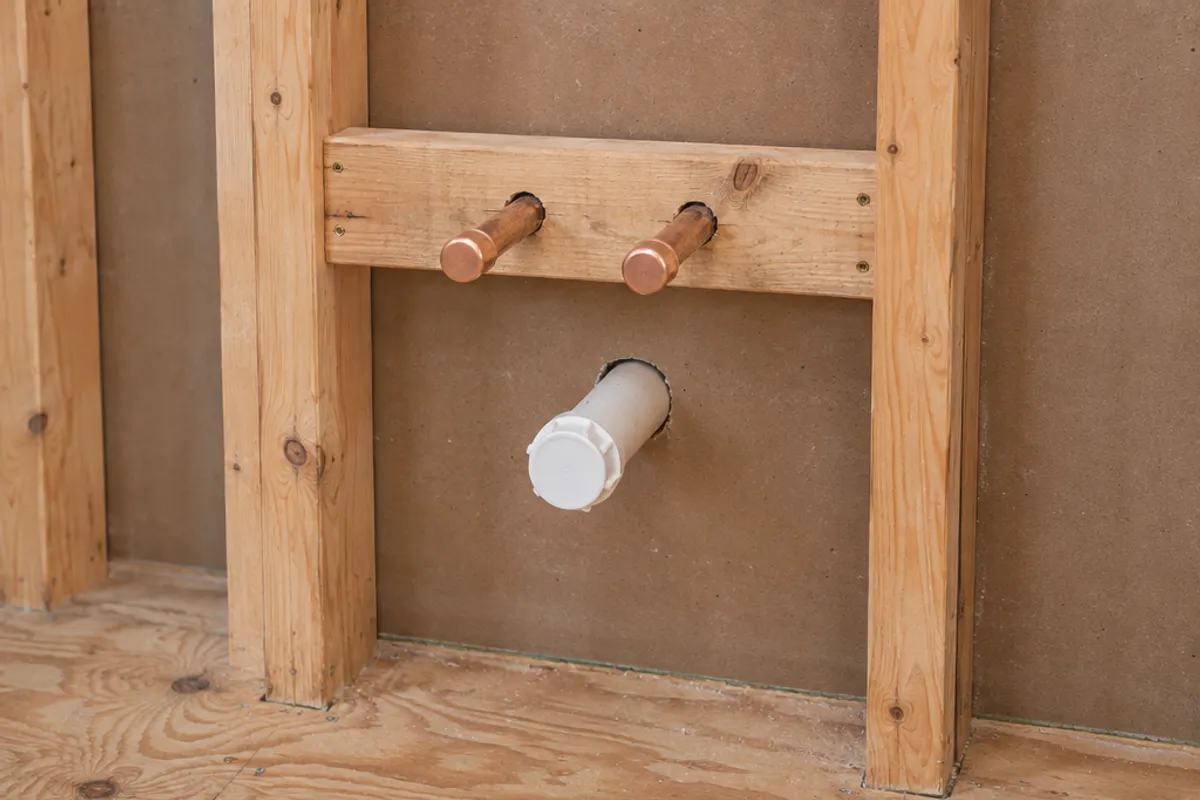
They are the short ends of pipe left sticking out of the wall or floor where a fixture will be connected. The hot and cold water ends are capped so the supply system can hold pressure; at finish, a shut-off is installed on each one. The ends of the drain lines are plugged and later connect to the fixture's trap, or to the closet flange under the bowl.
Where the water lines are PEX, plumbers often bring them out through a bent copper pipe or a bracket that holds the tube steady; follow the maker's installation instructions.
Where do the water supply and drain ends go?
The fixture decides, measured from the finished surface, not the bare stud:
- Toilet. The rough-in is the distance from the finished wall to the center of the drain outlet, as one maker's drawing shows. One maker's spec sheet lists a standard 12 in (305 mm) rough-in, with 10 in and 14 in (254 mm and 356 mm) kits available (both read on 2026-11-17). Choose the model before the drain is installed.
- Sink and vanity. Their spec sheet gives the drain and supply connections; mark them on the studs before the plumber begins.
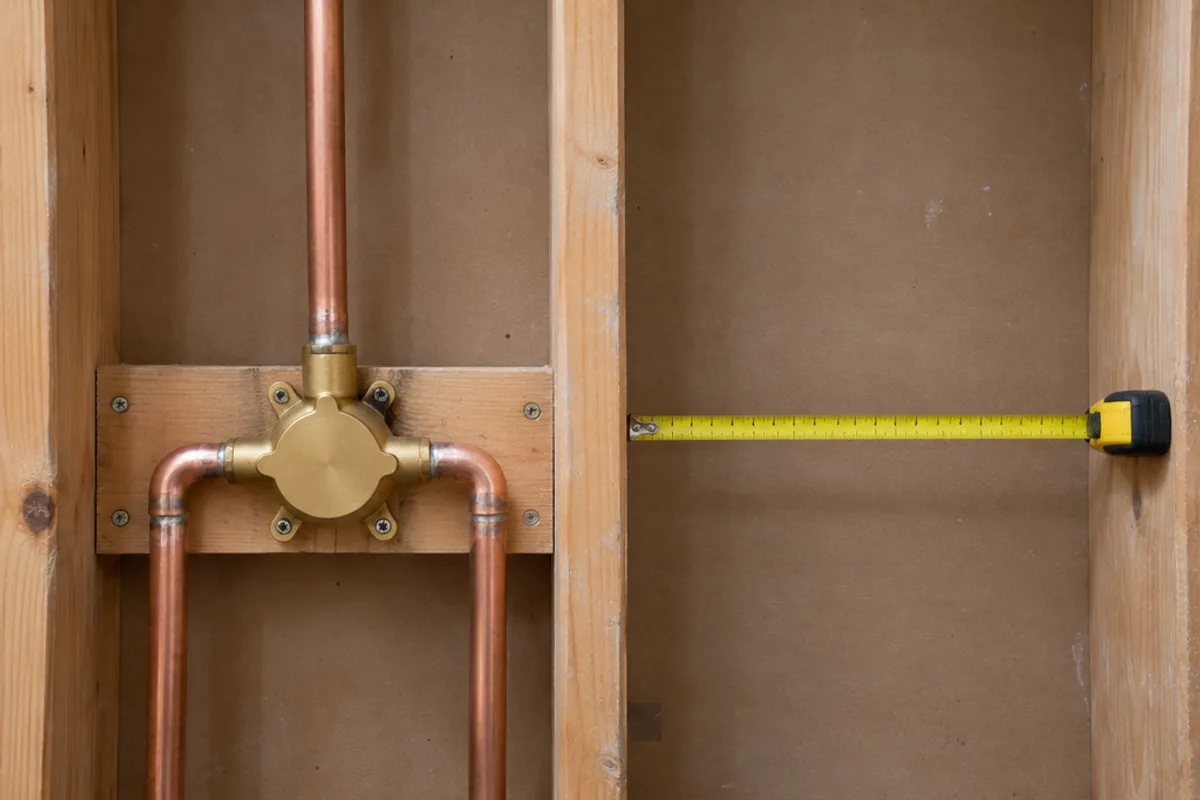
- Shower. The maker's rough-in guide sets its depth for your finished surface; see standard shower valve height for the height.
- Pot filler. Its own rough-in sheet gives the connection; see pot filler installation.
Why is rough-in the time to frame access openings?
Once the wallboard is up, the only way back to a valve, drain or cleanout is through an opening in the finished surface. During rough-in plumbing the bays are open, so you can decide where each opening goes and create a clear stud bay for it before the rough-in is completed.
| Behind the wall | Why you will reach it | At rough-in |
|---|---|---|
| Shower valve | Cartridge swaps, leaking connections, a new body | Set it where the back of the wall faces a closet or another room; no blocking in that bay |
| Bathtub drain and overflow | Leaking seals and the trap | Plan an opening at the drain end, from the room behind or the ceiling below |
| Cleanouts | Snaking a blocked drain line (what a sewer cleanout is) | No framing or cabinet in front of the plug |
| Shut-offs | Turning the water off fast | Group them behind one opening |
Note each spot's distance from the floor and the nearest corner, photograph the bay, and cut the openings once the wallboard installation is completed. These are the openings our catalog covers:
| Model | Type | Opening | Overall size |
|---|---|---|---|
| SAP0808 | spring-loaded panel | Fits 6 × 6 to 8 × 8 in openings | 10 × 10 in |
| SAP1414 | spring-loaded panel | Fits 10 × 10 to 14 × 14 in openings | 16 × 16 in |
| PAD1212 | hinged door | Maximum service opening 10.35 × 10.35 in (estimated) | 12 × 12 in |
| PAD1216 | hinged door | Maximum service opening 10.35 × 14.35 in (estimated) | 12 × 16 in |
A spot you will open again suits a hinged door such as the PAD1212; how to size the panel for a shower valve covers sizing. A cleanout you rarely open suits a spring-loaded panel. The plumbing access panels page groups them by job.
Our plastic access panels and doors are not fire-rated, and we publish no water-resistance rating for them, so don't fit one in a fire separation, such as the wall between a house and an attached garage.
Keep every opening out of tiled surrounds.
What happens after the rough inspection passes?
Once rough-in plumbing passes, insulation and wallboard go up, and tile and paint are completed. The finish plumbing phase follows: shut-offs on the water lines, the toilet on its flange, the sinks, and the trim. The project ends with the final inspection, once every fixture is connected and working.
Cut the access openings late in the process, before the last coat of paint, using your rough-in plumbing photos. Our pre-drywall inspection checklist covers the walkthrough just before the framing is covered, and the basement bathroom rough-in guide covers drains under a slab.
Measure before you order: our guide on how to measure for an access panel shows how, and the access panel size chart compares every opening and cover. How to install an access panel in drywall covers fitting it.