
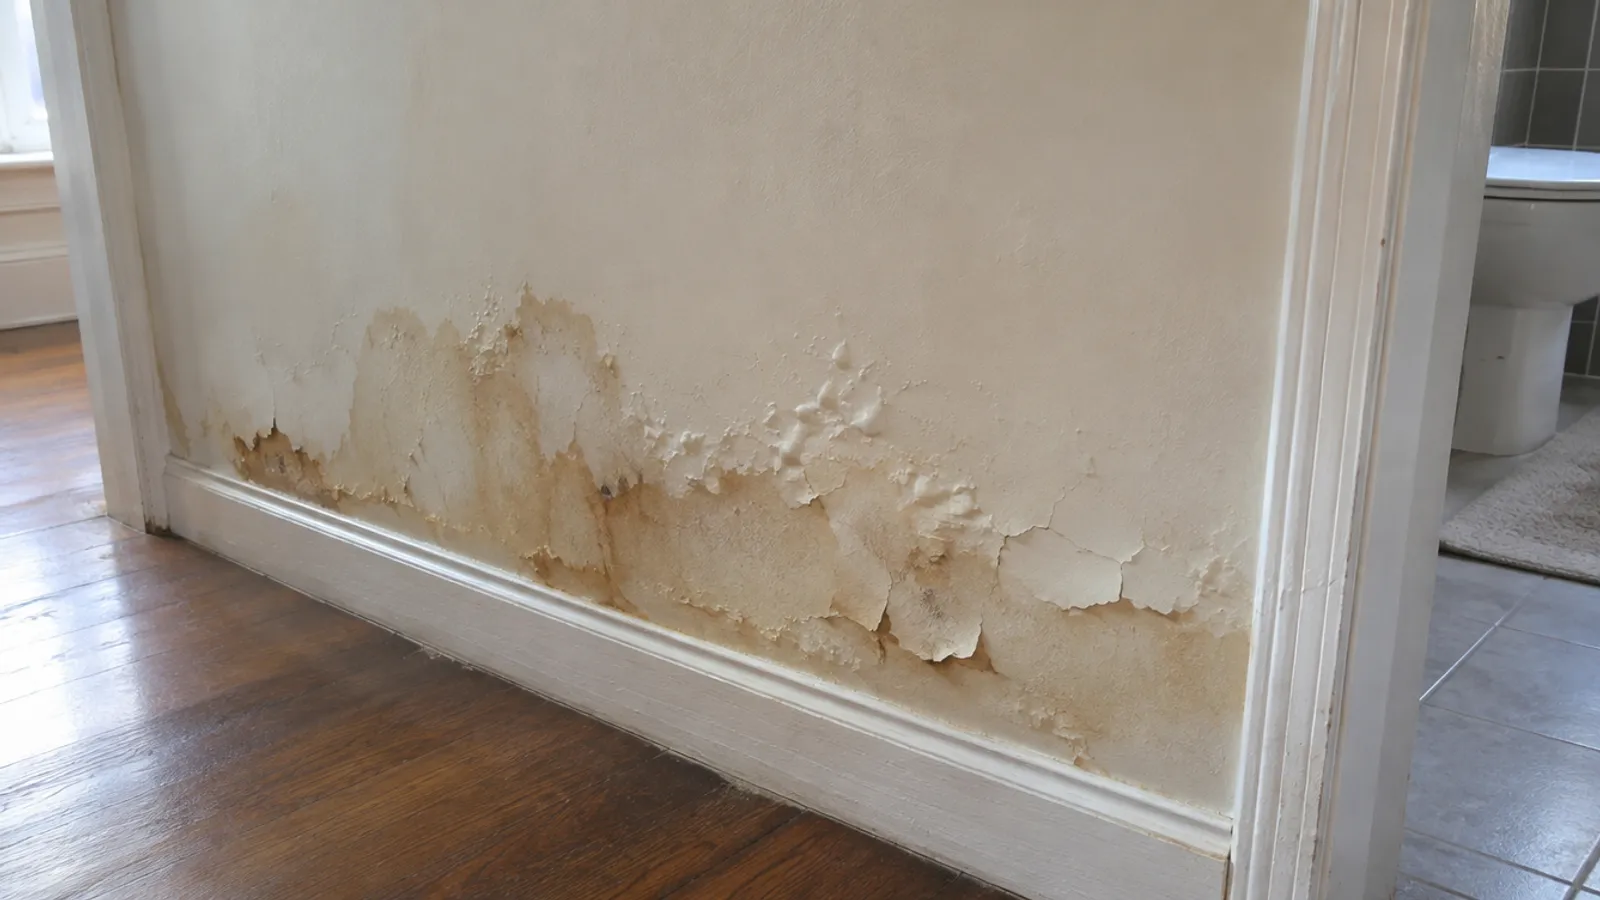
A leak behind a shower wall shows up as stains or peeling paint on the wall's far side or the ceiling below, and as soft grout. Find it by elimination: a leak that runs with the shower off is the valve or its pipes; one that appears only while showering is the shower arm, drain, grout or door.
Fix that source, let the wall dry, and close the opening with a hinged door so the next repair is easy. A shower leaking behind wall tile rarely means tearing it out: below are step-by-step solutions for each kind of shower leak.
What are the signs of a leak behind shower wall tiles?
Hidden leaks rarely show up in the shower itself. Water seeps into the wall cavity, soaks the studs and the back of the drywall, and appears somewhere else, so check both sides and the floor below. The signs of a shower leak behind the wall:
- Water stains and peeling paint on the other side of the shower wall, in a hallway, closet or bedroom, often with a swollen baseboard.
- A stain on the ceiling below. If the bathroom is upstairs, look at the first floor ceiling under the shower.
- Soft, dark or cracked grout that stays dark long after a shower, and loose tiles that move or sound hollow when you tap them.
- Gaps or mold in the caulk at the corners, along the shower base and around the door.
- A musty smell in the bathroom or the room behind it.
- Higher water bills with no change in how you use water: a supply leak costs money every hour it runs.
- A water meter that moves while every tap, toilet and appliance is off.
Confirm it with a moisture meter
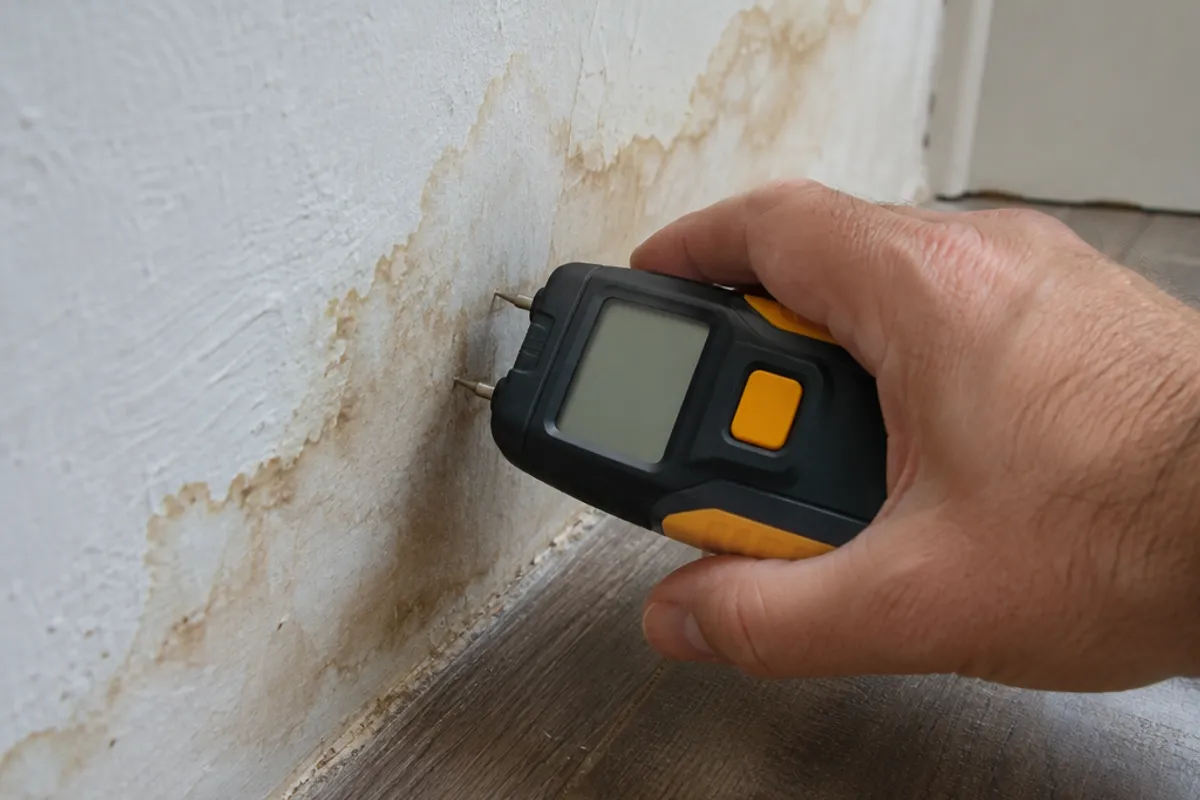
A pin moisture meter confirms these signs: a higher reading on the stain than on a dry spot nearby means moisture inside the wall. The wettest spot is usually nearest the leak.
What happens if you leave it?
Don't wait on these signs. A behind-wall leak left untreated keeps water leaking into the framing, subfloor and ceiling, and leads to water damage, mold and structural damage that turn a simple fix into costly repairs.
Fixing it early is how you prevent damage to the floor and ceiling below.
What are the common causes of a shower leak behind the wall?
Every shower leak behind the wall comes from one of two groups of parts, and the timing of the leak tells you which. That is the first step: determine the group, then test the parts in it.
| When it leaks | Likely source | How to confirm it | Usual fix |
|---|---|---|---|
| All the time, shower off or on | Valve and its seals, supply pipes and fittings | Water meter test | A new cartridge or seals, a remade joint, or a new valve |
| Only while the shower runs | Shower arm, its elbow, the pipe up from the valve | Run the shower aimed at the drain | Reseal the arm, or reach the elbow from behind |
| Only while water goes down the drain | Drain body and its seal | Pour water into the drain only | Reseal or replace the drain |
| Only when water hits the walls or door | Cracked grout, failed caulk, cracked tiles, door seals | Wet one area at a time | Regrout, recaulk, replace cracked pieces or seals |
Leaks all the time: the shower valve, pipes and fittings
The hot and cold water supply pipes and the shower valve are under pressure all the time, so a leak here runs day and night and wastes water and money.
The usual suspects are a faulty valve whose internal seals, O-rings and washers let water escape behind the trim plate (the shower plate around the handle), a cracked or corroded valve, and loose fittings or damaged pipes near it, with water leaking from a joint.
In cold-winter regions such as Alberta, Quebec and the Maritimes, a shower on an exterior wall adds one more suspect: a supply pipe that froze and split in a cold snap.
Leaks only while you shower: shower arm, drain, grout and door
The pipe from the valve up to the shower head is under pressure only while water is flowing, so a leaking shower arm, or a loose elbow behind it, leaks only while the shower is on. So does a failed drain seal.
Worn grout, failed caulk, cracks and worn door seals let water seep through every time you shower, which is why a leaking shower door or corner can look like a plumbing problem.
How do you find the source of a leaking shower?
Work by elimination, from the test that needs no tools to wetting one spot at a time. Between tests, inspect the stain, the ceiling below and your meter readings.
Do the water meter test
- Turn off every tap, toilet and appliance that uses water in the house.
- Find the water meter and note its reading. Many meters also have a small leak indicator that turns with even a slow leak.
- Wait a few hours without using any water, then read the meter again.
If the meter moved, there is water leaking somewhere on the supply side. Rule out the toilets, then suspect a behind-wall leak at the valve or its pipes, especially if the stain keeps growing while nobody showers. Fix that one soon, because it never stops. If it didn't move, the leak happens only while the shower runs.
Test the drain, then the shower arm
Pour a few buckets of water straight into the drain, keeping the rest of the shower dry, then check below. If that stays dry, run the shower with the head aimed straight down at the drain, so water runs through the arm but only the drain gets wet.
A leaking shower at this stage points to the shower arm, its elbow or the pipe up from the valve.
Wet the grout, caulk and door one area at a time
With a handheld sprayer or a cup, wet one wall's joints, then the corners, then the door and its seals. Wait and check the other side after each one. The area that brings the stain back is your culprit.
How do you fix a leaking shower valve, shower arm or drain?
A leaking shower usually has one source, so fix the one you found and only that. Each repair below fixes one culprit.
Cracked grout and failed caulk
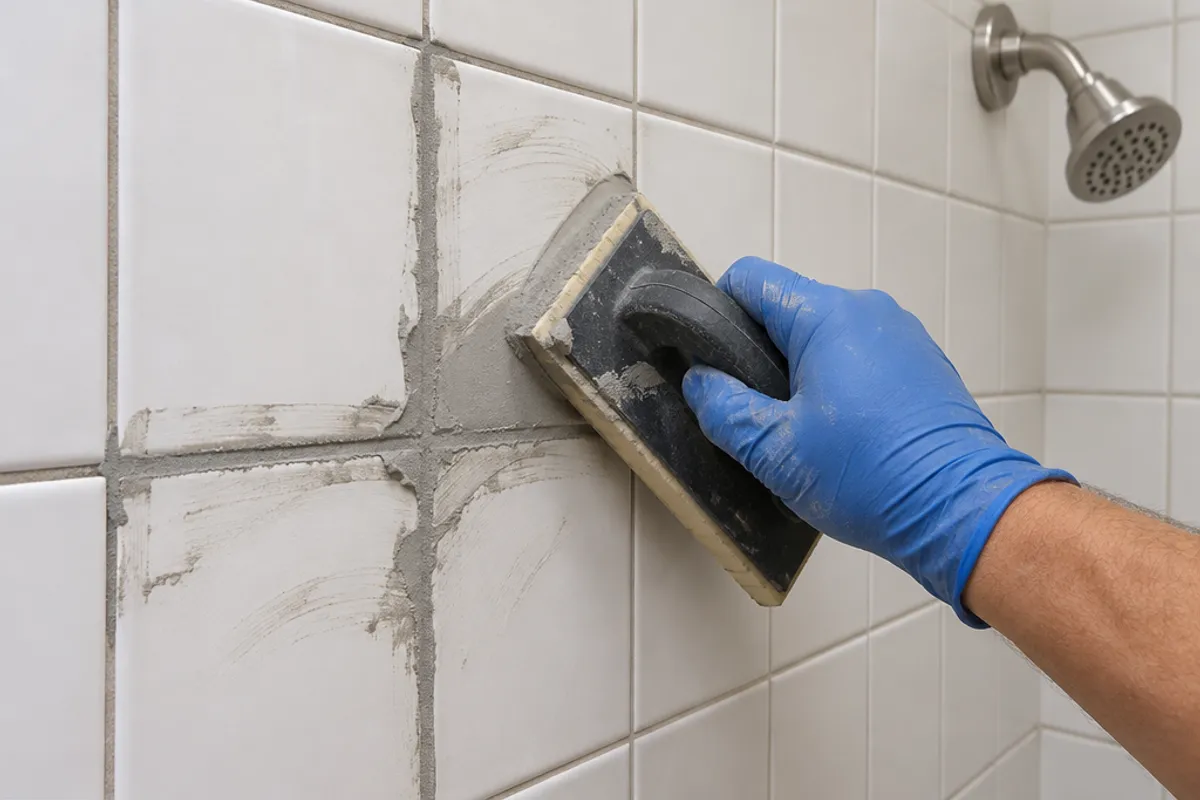
Rake out the old grout with a grout saw, let the joints dry, and regrout following the manufacturer's instructions. Seal the new grout if the product calls for it, to prevent water from seeping in again.
Cut out old caulk at the corners, along the base and around the door, where steam and water escape most easily. Clean and dry the joint, lay a new bead of sealant made for tubs and showers, and let it cure for as long as its instructions say before you shower.
A few cracked tiles don't mean retiling the whole thing: replace them one by one. If a wide area feels loose or soft, the backer board behind it is likely damaged, a bigger repair for a pro.
In the long run, grout and caulk are maintenance items: inspect them whenever you clean, so small gaps get fixed before they turn into expensive repairs.
A leaking shower arm
Unscrew the shower head, then turn the arm counterclockwise to remove it. Clean the old tape and sealant off the threads, wrap the threads with new thread seal tape in the direction they screw in, and tighten the arm back into the elbow until it is snug and points the right way. If the elbow itself is loose or leaking, reach it from behind, as described below.
A faulty valve or a worn cartridge
Shut off the water supply to the shower first: at the valve's built-in stops if it has them, or at the main shut-off valve. Remove the handle and the shower plate, take out the retaining clip or nut, and pull the old cartridge. Match the replacement to your valve's brand and model, and install it following the manufacturer's instructions.
On older two- and three-handle valves, the stem and its washers do the same job. If the valve itself is cracked or corroded, it has to be replaced, which means behind-wall pipe work.
Replacing a shower valve or soldering a joint is work for a licensed plumber where your area requires one, and it may need a permit. Before you take anything apart, shut off the water and open the valve to release the pressure.
The drain or a supply joint
A leak at the drain usually means the seal between the drain body and the base has failed. On many shower bases you can reseal or replace the drain from above; see how to replace a shower drain.
A threaded or compression fitting that weeps may only need a slight tighten. A leaking soldered joint needs a new joint or a repair coupling, and badly damaged pipes need a new section.
How do you reach the shower valve behind the wall without removing tile?
Open the wall from the other side. Most showers share a wall with a closet, hallway, bedroom or another bathroom, and drywall there is far easier to open and close again than the shower side.
- Shut off the water supply, and turn off the power to circuits in that wall at the breaker.
- On the shower side, measure from a corner and from the floor to the center of the handle, then transfer those measurements to the other side.
- Find the studs and plan an opening between them, with the valve roughly in the middle. If you will close it with a hinged door, trace that door's 1:1 cut-out template now, so the repair opening is the door's cut-out from the start.
- Cut a small inspection hole inside the outline and look in with a flashlight before you cut the rest.
- Cut the outline with a drywall saw, using short strokes, and stop if you hit anything.
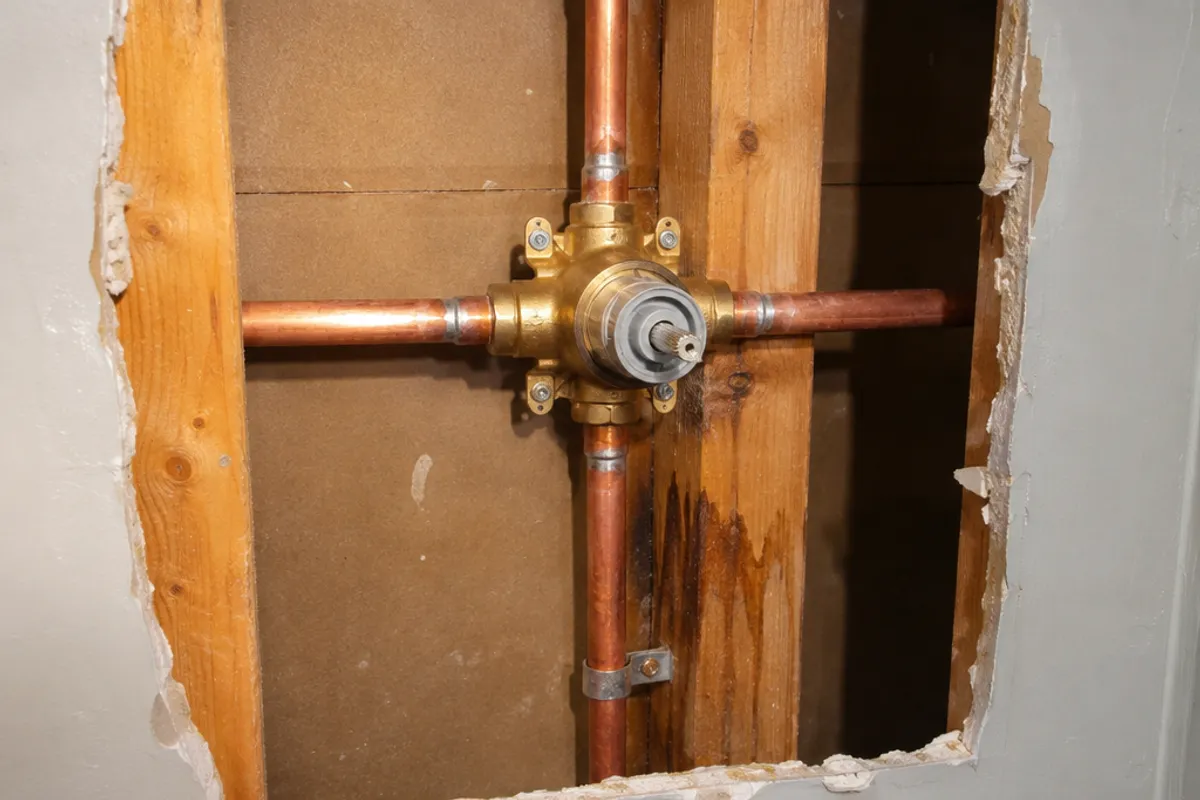
Check the valve and pipes with the wall open
Inspect the valve, the supply pipes, the pipe up to the arm and the elbow. Dry them with a towel, run the water, and watch for water leaking from a joint: that is the one to fix. Never cut a stud to make room.
The same idea works under a tub deck: see replacing a Roman tub faucet with no opening below it.
How do you dry out water damage and check for mold?
Let everything dry before you close up. Closing it wet traps the water damage inside, and mold growing out of sight leads to costly repairs later.
- Remove wet insulation and any drywall that is soft or crumbles.
- Run a fan into the opening and a dehumidifier nearby.
- Check the studs, the bottom plate and the back of the drywall with the pin meter, and wait until they read like a dry part of the house.
- Inspect the wood for dark staining, softness or rot. Soft framing or subfloor is structural damage, so have a contractor look at it.
- If you find mold over a large area, or it comes back, have a professional assess it.
Then run the shower once more and check the repair, and the signs on the other side, before you close up.
When should you call a professional plumber?
Finding leaks behind walls is routine work for a plumber. Call a professional plumber when the valve has to be replaced, when a joint needs soldering, when you can't find the source after the tests above, when a leaking shower keeps coming back after a repair, or when hidden leaks sit above a finished ceiling you would have to open.
If the stain isn't near a shower at all, our guide to a water leak behind a wall covers the other usual sources.
How do you close the wall so the next repair is easy?
Patch it, or fit a hinged door. A patch hides the valve again, so the next shower leak means another cut before you can fix it. A hinged door keeps the valve one latch away, and it can go in the opening you just made.
Which hinged door fits the opening?
Two doors from our catalog suit a shower valve opening:
| Model | Size on the wall | Service opening and cut-out |
|---|---|---|
| PAD1212 | 12 × 12 in overall | 10.35 × 10.35 in (estimated), rounded corners |
| PAD1216 | 12 × 16 in overall | 10.35 × 14.35 in (estimated), rounded corners |
The cut-out is the size of the service opening, and each product page has a 1:1 cut-out template. The frame sits on the wall surface, covers the edges of the cut-out and is screwed on, and the screws come with the door.
Size the opening from the valve and your reach, as in how to size the opening for a shower valve, and compare more options on the shower valve panels page and the hinged doors page.
Install the door on the dry side, never inside the shower. Our doors carry no water-resistance rating and are not part of a watertight seal.
Next, read how to size the opening for a shower valve, then compare every model on the size chart.