
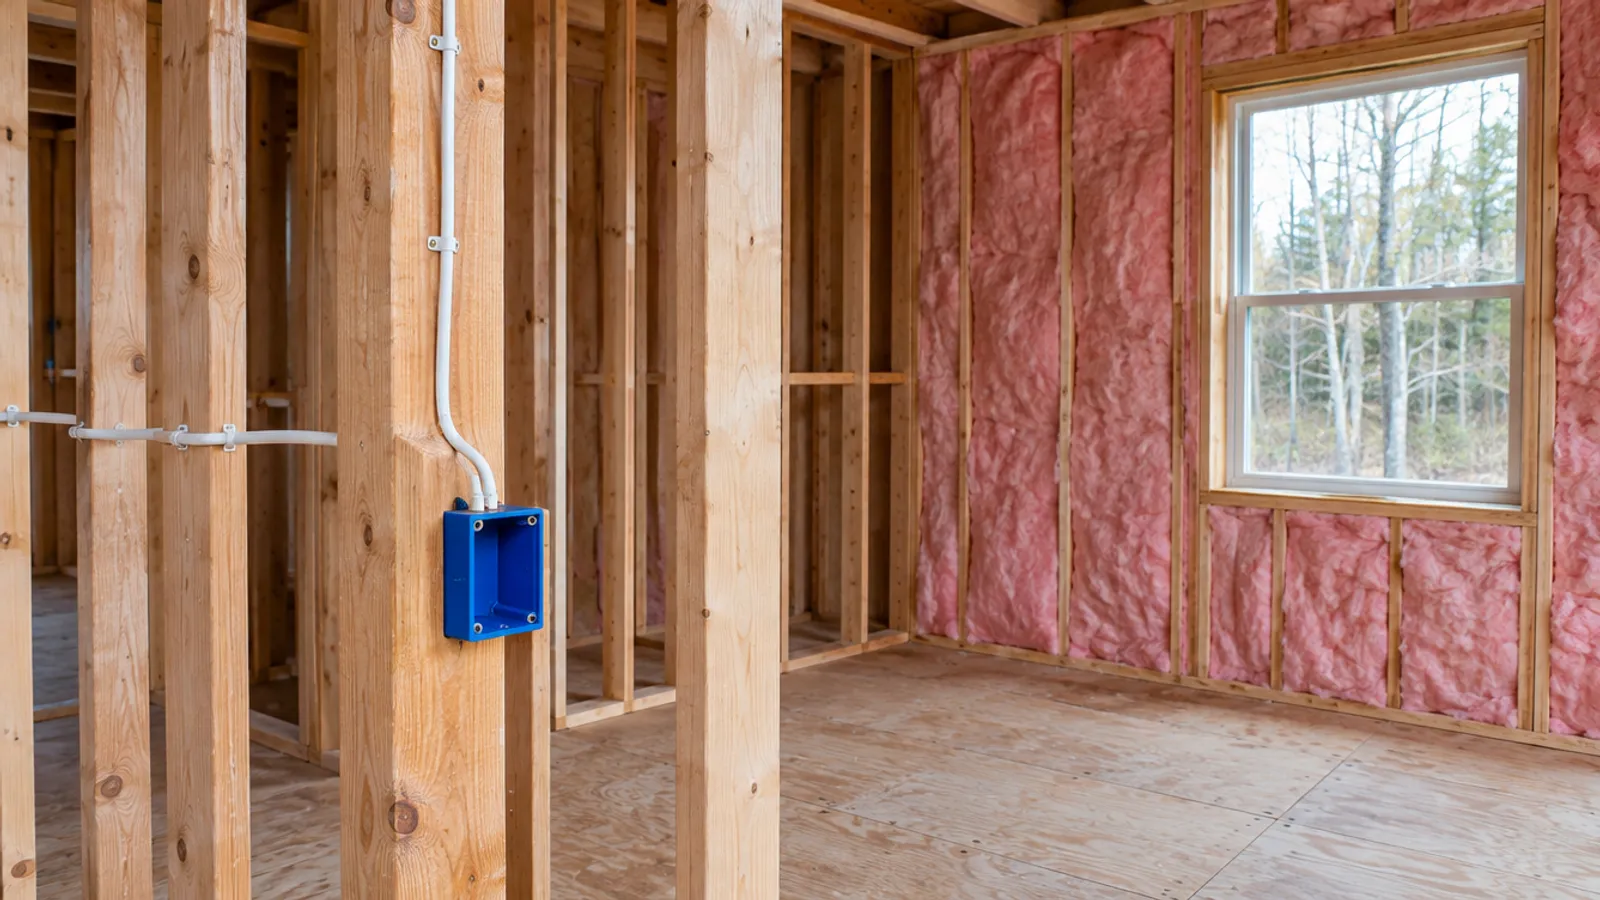
A pre-drywall inspection is a close look at a new or renovated house after the framing and rough-ins are done, but before drywall covers them. Check the framing, plumbing, electrical boxes, blocking, insulation, air sealing and low-voltage runs, photograph every wall, and confirm an access opening at each valve, drain, pump, cleanout and junction box.
It is the last stage at which the house's systems are visible, and a misplaced box or a missing block is a lot easier to fix now than after the drywall installation. The checklist below works for homeowners buying new construction and for owners running a renovation.
What is a pre-drywall inspection, and who does it?
Three checks happen while the walls are open, and they are easy to confuse:
| Check | Who does it | What it looks at |
|---|---|---|
| Rough-in inspections | The building department's inspector, under your permit | Whether the framing, plumbing, electrical and HVAC work meets the building codes your city enforces |
| Pre-drywall inspection | A home inspector you hire | Visible defects and workmanship in the framing, systems and insulation, written up in a report with photos |
| Pre-drywall walkthrough | You, usually with the builder's site supervisor | Whether the house matches the plans and your selections: outlets, switches, blocking, fixture positions and service openings |
The rough-in inspections are required wherever your permit calls for them, in the US and in Canada, and only the building inspector rules on code. A private pre-drywall inspection is optional and doesn't replace them, though your inspector may still flag code concerns for you to raise. If you are buying a new house from a home builder, review your purchase agreement first: it may say whether outside inspectors can visit, and when.
When should a pre-drywall walkthrough happen?
After the rough-ins are complete, when the framing, windows and exterior doors, plumbing, electrical wiring, HVAC and low-voltage systems are in, and before the drywall arrives. On new construction, ask your builder early where it falls in the build schedule and how much notice you'll get, because drywall can follow soon after the rough-in inspections pass.
Also ask about timing around insulation. Before it, the wires and pipes in exterior walls are visible; after it, you can check the insulation itself. If you can, look at both stages. Bring the plans, your selections and change orders, a tape measure, a flashlight and a charged phone.
What goes on a pre-drywall inspection checklist?
Walk the whole house once, then go system by system with this pre-drywall inspection checklist. For every item, ask two questions: is it in the correct location on the plans, and is it properly installed?
Framing alignment, headers and shear walls
- Sight along each wall, and put a long level where cabinets, tile or a counter will go; a bowed stud there shows through the finish.
- Verify that window headers and door headers sit over every opening, and that the rough openings match the window sizes on the plans.
- Shear walls have the sheathing and nailing the construction drawings show.
- Ask how any notched, drilled or cut joist, truss or stud was approved; a wrong cut in a structural member is far harder to repair after drywall.
Plumbing rough-ins
- Drain and water stubs sit where the plans put each sink, tub, shower and the toilets, measured from the finished surface, not the bare stud.
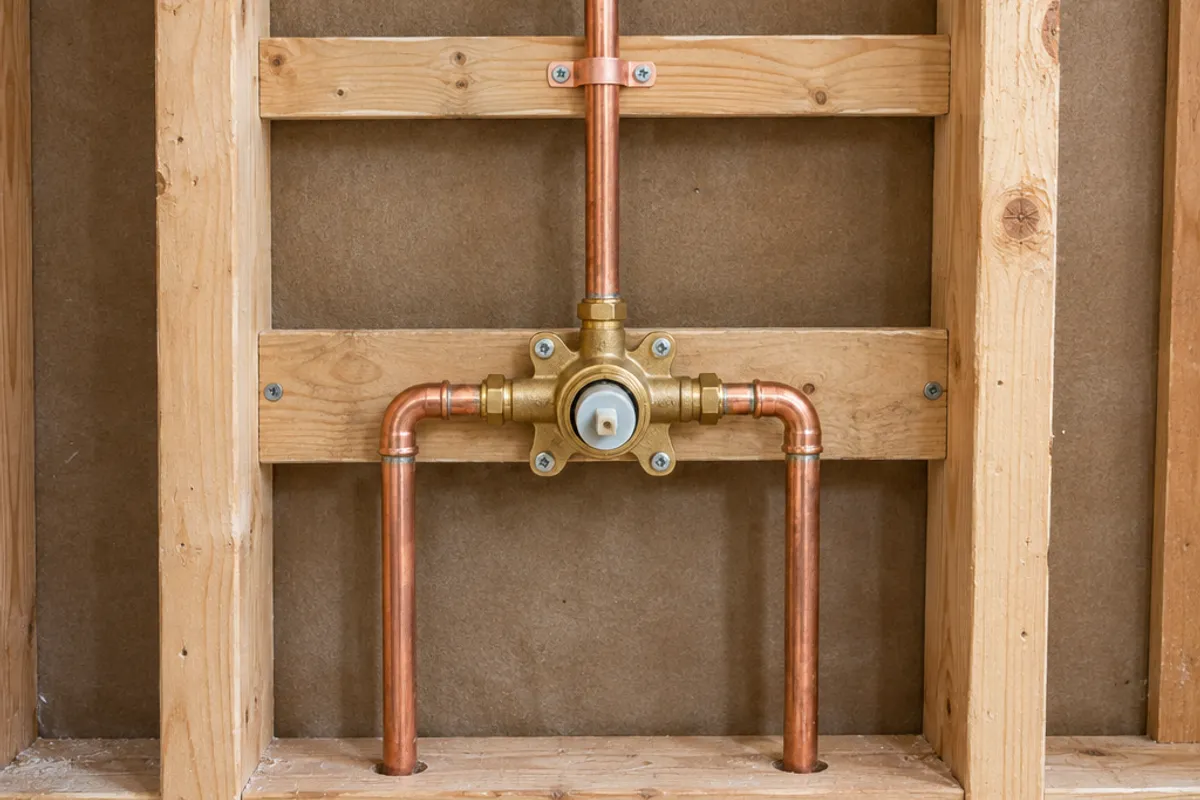
- Shower and tub valves are installed at the correct height and depth for your finished wall, tile included, as their maker's rough-in guide gives them.
- Pipes are strapped, with steel nail protection plates where they run close to the face of a stud, so a drywall screw can't reach them.
- Confirm the water and drain lines have passed their test.
- In cold places such as Alberta, the Maritimes or the northern US states, ask what freeze protection any water line in exterior framing has; see can PEX pipe freeze.
Electrical wiring, HVAC and fire blocking
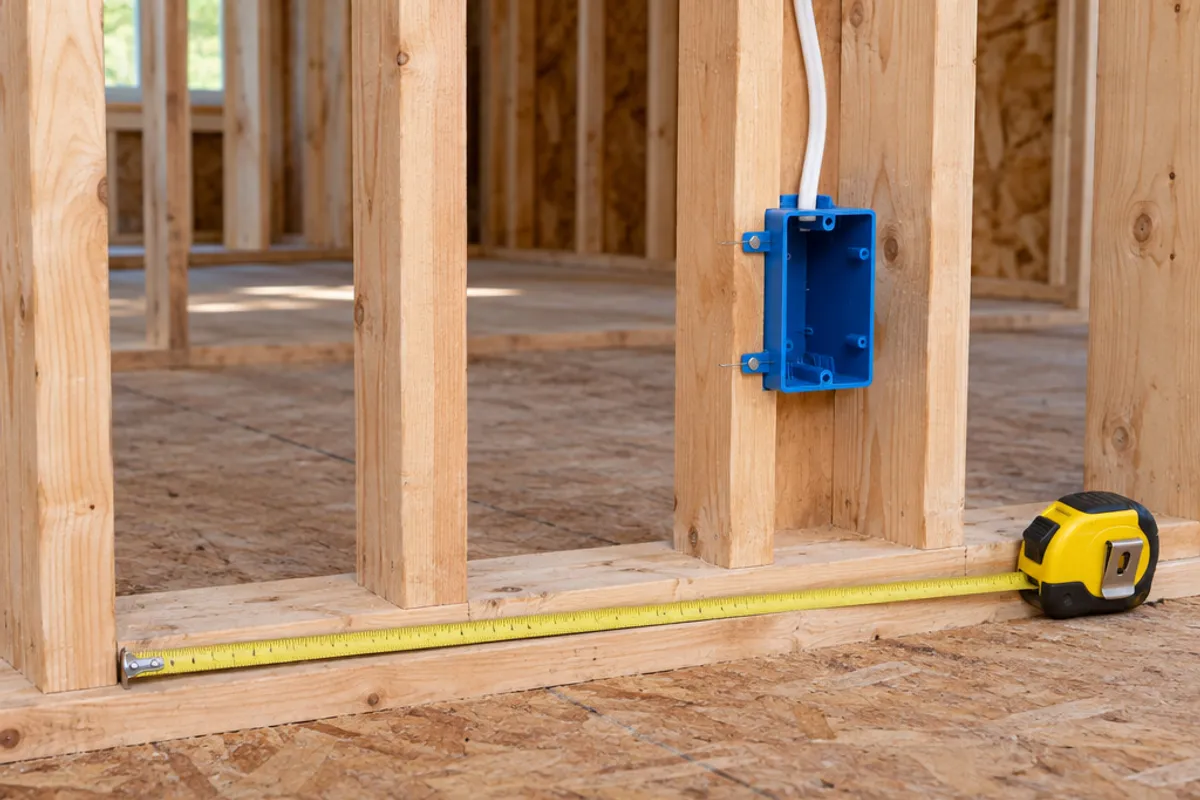
- Count the electrical boxes against the plans: outlets, switches, lights and fans at the heights you chose. Smoke and carbon monoxide alarm boxes are installed where the plans show; they are fire and life safety components, so verify each one's location.
- Cables are stapled, with nail plates near the stud face.
- Every junction box has to stay accessible once the walls close (can you drywall over a junction box explains why), so confirm where each one ends up and that none is left hidden.
- HVAC ducts are connected, supported and sealed, and registers and returns sit where furniture won't cover them.
- The HVAC equipment and its components have room around them for service, and bath fan and dryer ducts reach their outside hoods. Ask the HVAC installer to verify any duct run that changed from the plans.
- Fire blocking, and fire caulk at holes through the top plates, are in wherever the applicable code or the plans call for them.
Treat the house as a construction site. Don't pull wires, open boxes or move pipes on a walkthrough. Changes to electrical wiring, gas lines or plumbing go back to the builder's trades: a licensed electrician or plumber where your state or province requires one.
Blocking, insulation and exterior penetrations
- Blocking, the lumber between studs that a screw bites into, is properly installed behind each grab bar, towel bar, TV mount, wall cabinet, floating vanity, handrail and curtain rod you planned.
- Insulation materials match the plans, and the insulation is correctly installed: each cavity filled, with no obvious gaps or compressed batts, including exterior walls behind tubs and showers, which are hard to reach once the tub is set.
- Holes for wires, pipes and ducts through the top plates and exterior walls are sealed; gaps there undercut the insulation's performance.
- Exterior penetrations, such as hose bibs, vents, gas lines and cables, are sealed or flashed outside. After rain, look for signs of water intrusion: wet or stained framing under installed windows.
- Network, coax, speaker, security and doorbell wires end where you want them, labeled at both ends. After drywall, a new run means fishing wire through a finished wall.
How do you document a pre-drywall walkthrough?
Whoever does the inspection, photograph every wall and the systems in it from corner to corner, with a tape measure from the corner or the floor visible in the frame. Then document each valve, drain, box, block and HVAC run in close-ups. Measure the location of anything you will need later from the floor and the nearest corner, and write it on a copy of the floor plan. Years from now, those construction photos show you where to cut.
Use a digital checklist
Keep a digital checklist on your phone, a shared document or an inspection app, with each item's photo, location and status: open, fixed or verified. Send it to the builder the same day.
Which items need an access opening before the walls close?
Anything in the plumbing or electrical systems that someone will need to reach later, for a repair, an adjustment or a later inspection. The pre-drywall inspection is your last chance to frame an opening of the correct size in front of each one while nothing is hidden.
| Behind the wall | Where it usually is | What to confirm now |
|---|---|---|
| Shower or tub valve | The wall behind the fixture | The back of that wall faces a room where a panel can go, and the stud bay behind the valve stays clear |
| Tub drain and overflow | The drain end of the tub | An opening at the back of the plumbing wall |
| Whirlpool pump and controls | Under the tub deck or behind the apron | An opening right next to the pump |
| Cleanout | On a drain line or at the base of a stack | No framing, cabinet or soffit over it, and room for a wrench and a drain snake |
| Junction box | Walls, ceilings and attics | A cover or panel for any box that lands in a finished surface |
| Shut-off valves or a PEX manifold | Ceilings, closets and mechanical rooms | An opening you can reach quickly, since they get used in an emergency |
Tub makers spell out what should stay accessible. One maker's drop-in whirlpool installation guide asks for unrestricted service access to the pump and controls, located immediately next to the pump. A second guide, for a whirlpool bath and surround, asks for access to all plumbing connections, at the back of the plumbing wall whenever possible (both read on 2026-11-17). Our whirlpool tub installation guide covers the rest of that job. A steam shower generator needs its service opening planned now too; see steam shower generator installation.
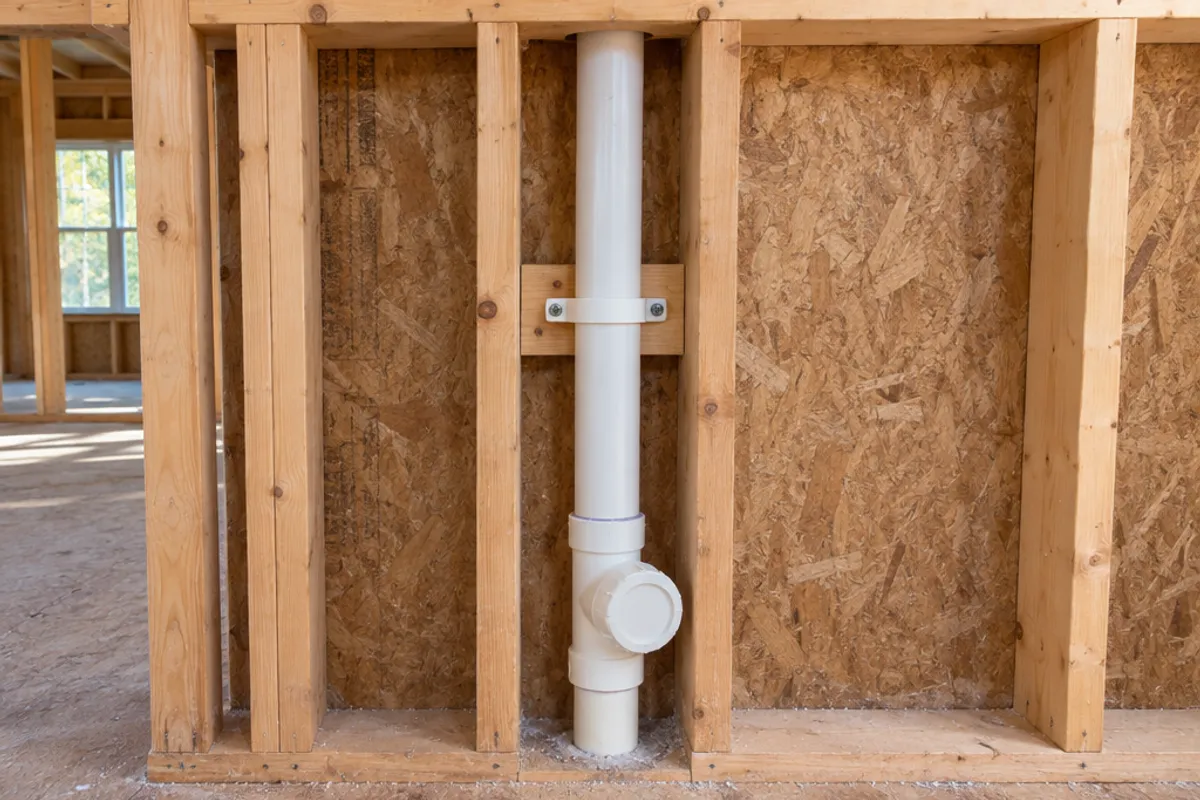
At each spot, check that the opening fits between the framing in front of it, with no blocking or bracing in that bay; if it doesn't, ask the builder how to frame it now. These are the openings our catalog covers:
| Model | Type | Opening | Overall size |
|---|---|---|---|
| SAP0808 | spring-loaded panel | Fits 6 × 6 to 8 × 8 in openings | 10 × 10 in |
| SAP1414 | spring-loaded panel | Fits 10 × 10 to 14 × 14 in openings | 16 × 16 in |
| PAD0808 | hinged door | Maximum service opening 6.35 × 6.35 in | 8 × 8 in |
| PAD1212 | hinged door | Maximum service opening 10.35 × 10.35 in (estimated) | 12 × 12 in |
| PAD1216 | hinged door | Maximum service opening 10.35 × 14.35 in (estimated) | 12 × 16 in |
A hinged door suits something you open every season, like the shut-off for an outdoor faucet; a spring-loaded panel suits a cleanout or junction box you rarely touch. For a shower valve, see how to size the panel for a shower valve, and compare the drywall access panels. Mark each opening on your floor plan.
Our plastic access panels and doors are not fire-rated, and we publish no water-resistance rating for them, so don't fit one in a fire separation, such as the wall between a house and an attached garage.
Keep openings out of tiled shower and tub surrounds as well.
How do you follow up on what the inspection finds?
Send the builder every finding from the pre-drywall walkthrough in writing, with its photo and location, and review the list together before drywall. Separate defects, work that isn't correctly installed or doesn't match the plans, from new requests, which your builder may treat as change orders. Ask the builder to correct each defect, then verify each completed fix with a photo or a return visit, and tick it off the checklist only once you have seen it. Code questions go to the building department's inspector, who decides at the rough-in inspection. Keep the report and the replies with your other construction documents for the final walkthrough.
Finishing a basement instead? Our guides to the basement bathroom rough-in and permits to finish a basement cover what is specific to that job. If the new bathroom sits below the sewer line, see how a macerating toilet works.
Measure before you order: our guide on how to measure for an access panel shows how, and the access panel size chart compares every opening and cover. How to install an access panel in drywall covers fitting it.