
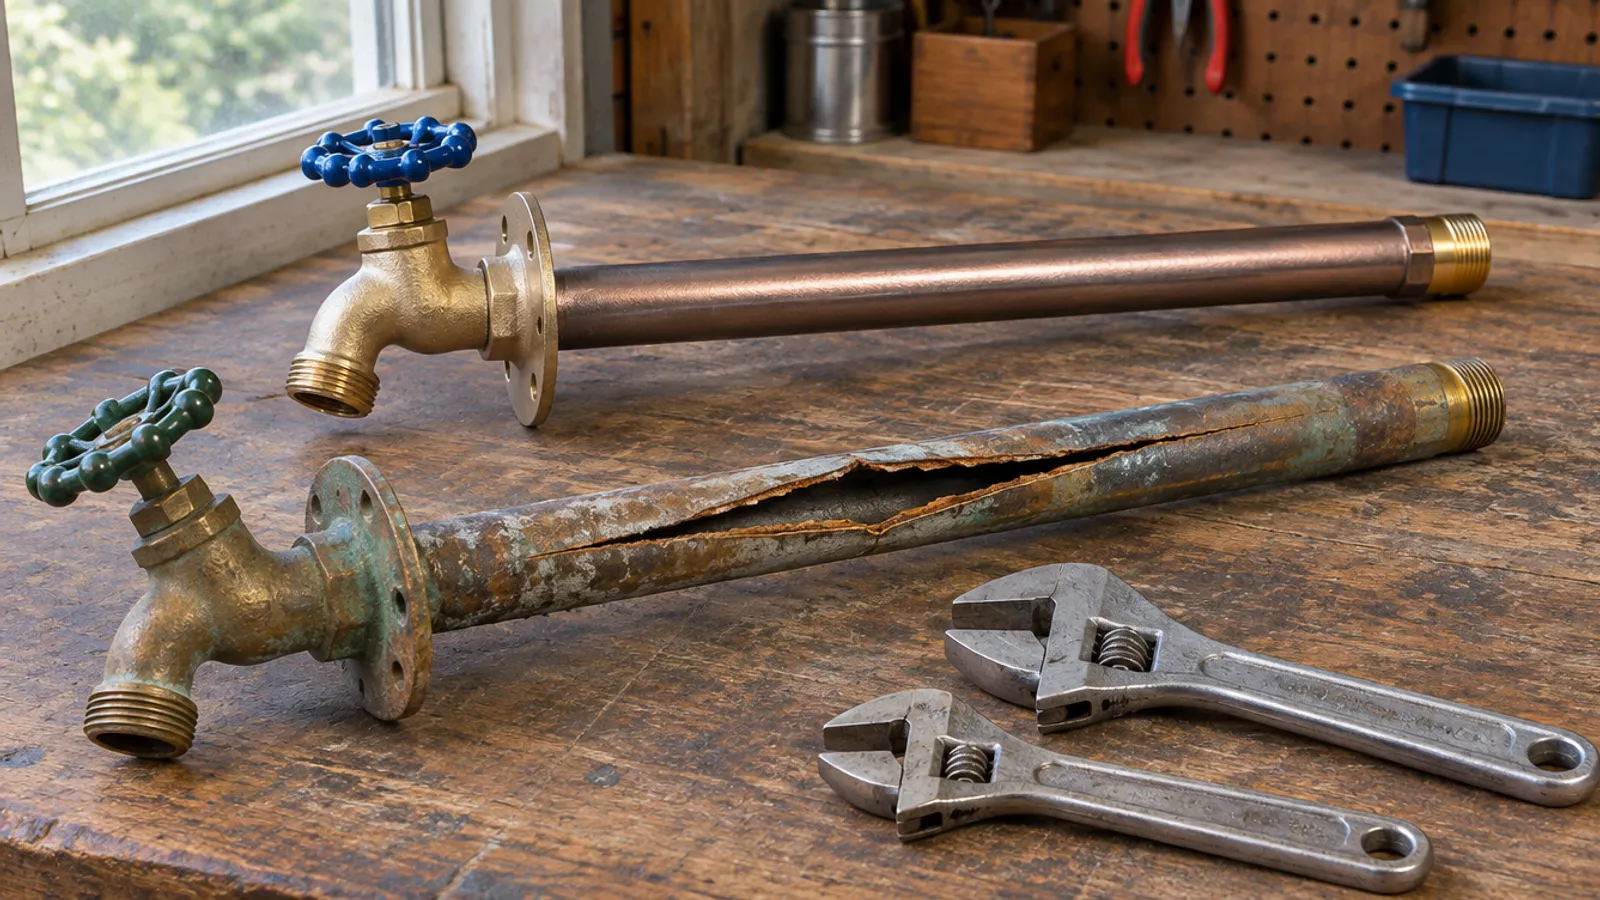
To replace an outside faucet, shut off its water supply and drain the line, then disconnect the pipe inside the house, remove the flange screws and pull the old spigot out through the wall. Slide in a new spigot of the same length and connection type, sloping down toward the outside, seal it and test for leaks.
A common reason is a frost-free sillcock (sold as a frost-proof spigot, and called an outdoor tap in much of Canada) that split in freezing weather with a hose attached. The swap is a short job. Reaching the pipe inside, often above a finished basement ceiling, is the harder part of the project.
What are the signs an outdoor faucet froze and split?
A frost-free outdoor faucet drains each time you turn it off, unless a hose left attached traps the water in its long body; our guide to turning off outside water explains why. That water freezes and can break the body where you can't see it.
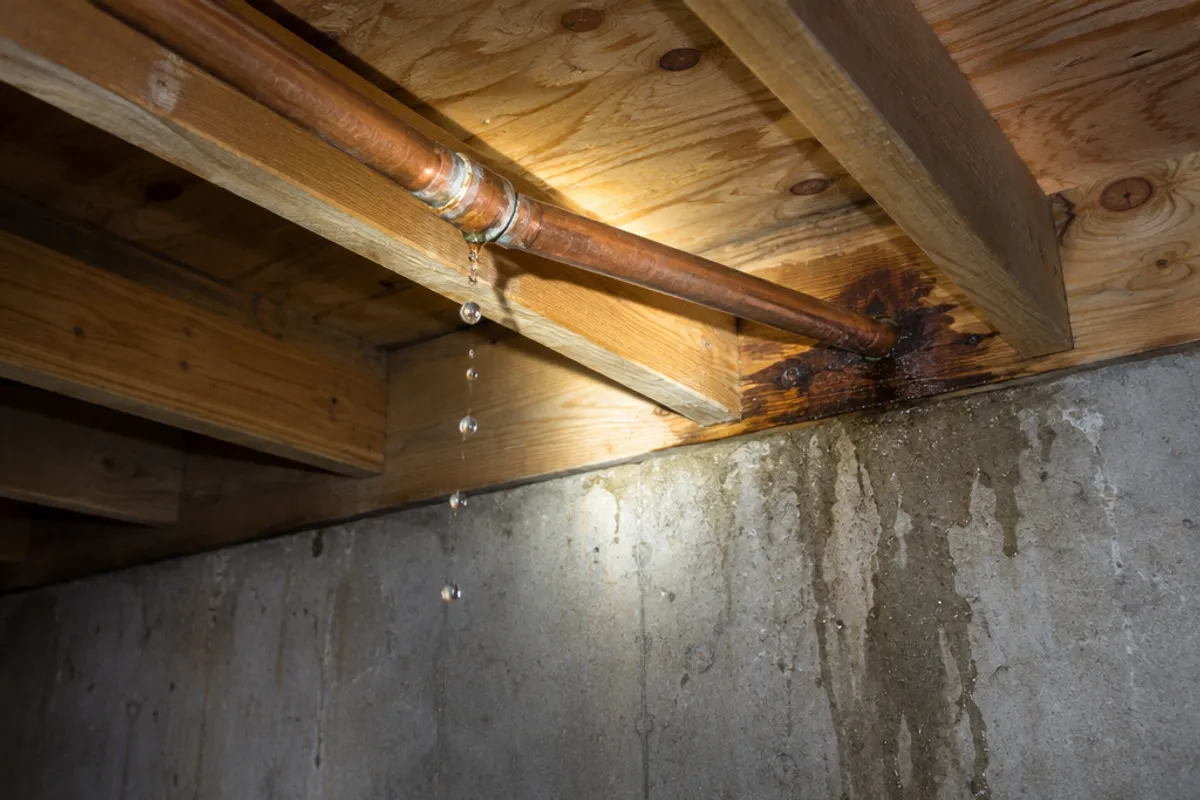
The split sits past the valve, so it usually leaks only while the spigot runs. Signs to look for:
- Water indoors while the spigot runs, on the ceiling or the rim joist behind it, stopping when you turn it off.
- Water from behind the outdoor faucet's flange, or pooling on the ground below, instead of from the spout.
- Weak water flow at the spout while the rest of the house has full pressure.
- A ceiling stain in spring, after the first use since the freeze.
Water leaks that continue with the outdoor faucet turned off are on the pressure side: the water supply pipe or its connection. Shut off the water and read our guide to a water leak behind a wall.
What if a frozen outdoor faucet has no water flow?
If nothing comes out on a freezing day, the outdoor faucet or the pipe feeding it is frozen. Thaw it gently, then test it.
- Disconnect the hose.
- Close the spigot's indoor shutoff valve, if it has one, so a split can't flood the wall as the ice melts.
- Turn the outdoor spigot on, so melting water has somewhere to go.
- Warm the spigot with a hair dryer, or towels soaked in hot water. For safety, never use an open flame or a torch.
- Turn the supply back on slowly. Once the water flow is back to normal, have someone watch the ceiling behind the spigot for a few minutes.
If water leaks inside, the body has split and needs replacing. If the ice is in the pipe itself, see how to thaw frozen pipes in a wall.
Should you repair the outdoor faucet or replace it?
Not every leak means a new faucet. Repairing one is often a matter of a stem washer or the packing nut.
| What you see | Likely cause | Repair or replace |
|---|---|---|
| Drips from the spout when turned off | Worn washer at the inside end of the stem | Repair: a new washer or stem from the same manufacturer |
| Leaks around the handle while it runs | Loose or worn packing | Repair: tighten the packing nut, or replace the packing |
| Water indoors only while it runs | Body split by freezing | Replace the spigot |
| Water indoors when turned off | The connection or the supply pipe | Fix the joint; the spigot may be fine |
| A standard outdoor faucet in a cold climate | No frost protection | Replace it with a frost-free spigot |
How to replace outside faucet washers and packing
Shut off the water and drain the spigot. Unscrew the packing nut behind the handle, then turn the handle counterclockwise until the stem unscrews and you can remove it. On a frost-free spigot the stem is long, because the washer sits at its inside end. Fit the new washer or stem, slide it back and tighten the packing nut until the stem turns firmly without leaking.
What do you need before you replace an outdoor spigot?
- The shutoff. Locate the valve that feeds the spigot, or the main shutoff. Our guide to where the water shut-off valve is covers both.
- The length. Frost-free spigots come in several lengths. To determine yours, measure the old spigot from the back of its flange to the end of its inlet once it is out, so the new one reaches the same pipe and keeps its inside end in the heated house, away from freezing air.
- The connection. Match the spigot's inlet to your pipe, using the table below.
- The pipe. Homeowners in British Columbia and Alberta with older plumbing may find grey polybutylene. Ask a plumber which fittings suit it; see what Poly-B looks like.
Match the connection to your pipe
This guide covers the outdoor faucet mounted on the house, not a freestanding yard hydrant; a hydrant comes with its own installation instructions.
| Connection | How to recognize it | What it takes |
|---|---|---|
| Threaded | A fitting with threads and flat sides for a wrench | Thread sealant or Teflon tape on the male threads, and a second wrench to hold the spigot |
| Soldered copper | A smooth copper joint with a ring of solder | A torch and soldering knowledge, or cutting the copper and connecting with another fitting |
| Push-fit | A fitting with a release collar where the pipe goes in | A square, clean cut pushed in to the depth mark, and a release tool to take it apart |
| PEX | Plastic tubing held by a crimp ring, a clamp ring or an expanded fitting | The fittings and the crimp or expansion tool made for that PEX system |
If you would rather not solder, push-fit and compression adapters are the usual solutions: cut the copper behind the old joint and connect the new spigot with one of them.
Tools and materials
Two adjustable wrenches, a tubing cutter, a screwdriver, exterior caulk or the spigot's gasket, Teflon tape (PTFE thread tape) for threaded joints, corrosion-resistant screws to secure the flange, a bucket and towels, plus the tool your connection needs: a release tool, a PEX crimp tool or a torch.
How do you replace an outside faucet, step by step?
This step by step guide is for homeowners doing the project themselves, with a frost-free spigot whose connection they can reach from inside.
Take the old one out
- Shut off the water at the shutoff valve, turn the outdoor spigot on and let the line drain. Grab a bucket for under the connection inside.
- Locate where the spigot's inlet connects to the water supply pipe. If it is above a finished ceiling, read the access section below before you proceed.
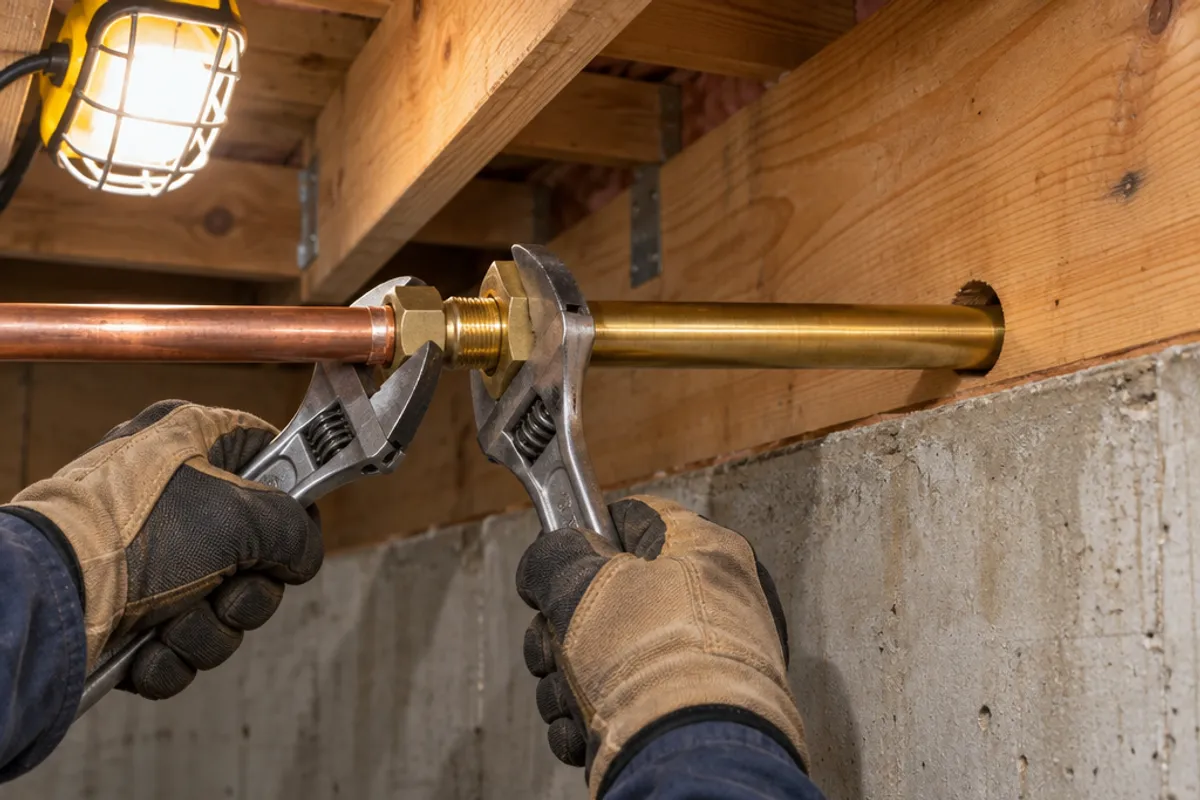
- Disconnect it. On threads, hold the inlet with one wrench and unscrew the fitting with the other, so the pipe doesn't twist or break. On push-fit, press the release collar with its tool. On soldered copper or PEX, cut the pipe just behind the joint with a tubing cutter.
- Outside, remove the flange screws, cut through the old caulk and pull the old spigot straight out. If it won't move, remove any strap securing its body inside.
- Look at the hole and the rim joist. Wet or stained wood means the old spigot has been leaking: let it dry before you close anything up.
Fit and test the new spigot
- Install the new faucet with a layer of caulk or the gasket behind the flange. Check that it slopes down toward the outside, then secure the flange with screws into solid material.
- Connect it inside. If the installation instructions say to remove the stem before soldering, do that first, so the hot copper doesn't damage the washer.
- Secure the pipe near the inlet with a pipe strap, so it can't move when someone uses the handle outside.
- Turn the water back on slowly and check the connection for water leaks. Then run the spigot with someone watching inside, and test again with a hose attached and its nozzle closed. Disconnect the hose before freezing weather.
Soldering copper means a torch next to the rim joist, insulation and siding. Use a licensed plumber where your area requires one, and ask your local building department whether replacing an outdoor faucet needs a permit.
Which way should a frost-proof faucet slope, and how do you seal it?
Slope it down toward the outside
A frost-free outdoor faucet only drains if its body runs downhill from the inside end to the spout. Installed level, or tilted back toward the house, it holds water and can freeze even with the hose off. If the old hole won't let the new spigot slope, ask a plumber for advice.
Seal both sides
Outside, caulk around the flange as the instructions describe, to keep rain out. Inside, seal the gap around the body so it can't create a cold draft along the pipe, and keep the spigot's inside end on the heated side of any insulation in the rim joist.
Many outdoor faucets also have a vacuum breaker, a small cap on top that stops hose water from being drawn back into your drinking water. Ask your building department whether your area requires one.
What if the shutoff valve is above a finished basement ceiling?
In a finished basement, the outdoor spigot's inlet and its shutoff valve often sit above a drywall ceiling. You have to cut in to replace the spigot, and you will be back every fall and spring to work that valve, so plan the project around an access door. Mark the hole from the door's full-size cut-out template, do the job through it, then secure the door's frame over the hole with the screws that come with the door. A valve sealed in indoors is the same problem, as our guide to replacing a tub faucet without an access panel shows.
| Hinged door | Service opening and cut-out | Overall size | Suits |
|---|---|---|---|
| PAD0808 | 6.35 × 6.35 in, rounded corners | 8 × 8 in | Reaching the shutoff and its handle |
| PAD1212 | 10.35 × 10.35 in (estimated), rounded corners | 12 × 12 in | Room for a wrench in each hand at the connection |
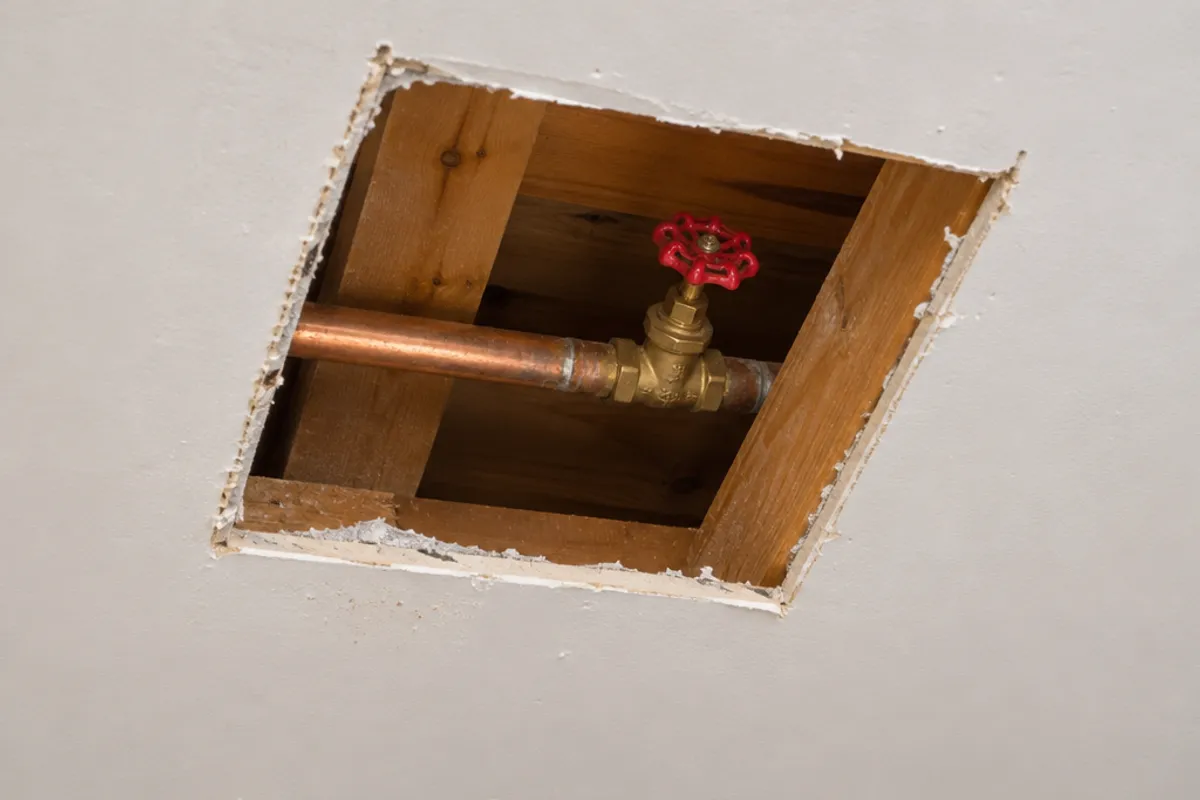
Before the ceiling goes back up, find out from your local building department what access it expects to the shutoff. Compare every hinged door on the access doors page, or options for pipes on the plumbing access panels page.
Once the new spigot is in, read how to turn off outside water before freezing weather.
Measure before you order: our guide on how to measure for an access panel shows how, and the access panel size chart compares every opening and cover. How to install an access panel in a ceiling covers fitting it.